
Introduction
How to Split Langoustines? Langoustines, often called Norway lobsters, are one of the most exquisite treasures of the sea. Known for their sweet, delicate flavor and tender meat, these crustaceans are a favorite in fine dining and home kitchens alike. Cooking langoustines may seem intimidating, but they’re surprisingly easy to prepare, requiring minimal effort to bring out their natural elegance. Whether you grill them for a smoky flavor, boil them for simplicity, or sauté them for a quick gourmet meal, langoustines can transform any dish into a luxurious experience. In this guide, we’ll explore the best methods to cook langoustines and tips to ensure perfect results every time.https://royalesrecipes.com/langoustine-recipe-a-culinary-delight-for-seafood-lovers/
1. Preparing Langoustines
Choosing Fresh Langoustines
Selecting high-quality langoustines is the first step to preparing a delicious seafood dish. Since their flavor and texture depend greatly on freshness, knowing how to identify the best langoustines can make all the difference in your cooking experience. Here’s what to look for when choosing fresh langoustines:
1. Appearance
- Vibrant Shell Color: Fresh langoustines should have bright orange-pink shells that look clean and shiny. Dull or discolored shells may indicate they are no longer fresh.
- Clear Eyes: The eyes should be dark and shiny, not cloudy or sunken. Clear eyes are a strong indicator of freshness.
- Intact Body: Look for langoustines with intact shells and claws. Damaged or missing parts can suggest they’ve been mishandled or stored improperly.
2. Smell
- Mild Sea Aroma: Fresh langoustines should have a clean, mild aroma reminiscent of the sea. Avoid langoustines with a strong, fishy, or ammonia-like smell, as these are signs they are past their prime.
3. Texture
- Firmness: Gently press the shell or meat; fresh langoustines should feel firm and springy. Soft or mushy spots can indicate spoilage.
- Moisture: The shell and meat should feel slightly moist but not slimy. A dry or slimy texture is a sign of age or improper storage.
4. Movement
- Live Langoustines: If you’re buying live langoustines, look for ones that are active and moving. A sluggish or immobile langoustine may no longer be alive or fresh.
5. Source
- Trusted Suppliers: Purchase langoustines from reputable fishmongers, seafood markets, or grocery stores with a high turnover of fresh seafood.
- Sustainable Harvesting: Whenever possible, choose langoustines sourced from sustainable fisheries to ensure environmental responsibility and high quality.
6. Seasonal Availability
- Peak Season: Langoustines are typically at their best between May and September. Buying them during this time ensures you get the freshest catch.
- Year-Round Availability: While langoustines are available year-round, those caught in their off-season may have been frozen and thawed, which can affect their flavor and texture.
7. Frozen Langoustines
If fresh langoustines aren’t available, frozen options can be a good alternative. Here’s how to select the best frozen langoustines:
- Check Packaging: Look for vacuum-sealed packaging with no visible ice crystals, which could indicate freezer burn.
- Inspect Labels: Choose langoustines labeled as “flash-frozen” or “individually quick-frozen” to ensure they retain their freshness and quality.
- Avoid Excess Frost: Excess frost or ice in the packaging can suggest improper freezing or storage.
8. Handling and Transport
- Keep Cool: If you’re transporting fresh langoustines, use a cooler or insulated bag to keep them chilled and preserve their quality.
- Cook Promptly: Plan to cook langoustines on the same day you buy them, or store them properly in the refrigerator for up to 1–2 days.
By paying attention to these key factors, you can ensure you’re choosing the freshest langoustines for your dish. High-quality langoustines not only enhance the flavor of your meal but also elevate the overall dining experience.
Cleaning Langoustines: Step-by-Step Guide
Cleaning langoustines properly is essential to ensure their sweet flavor and tender texture shine in your dishes. Whether you’re cooking them whole or using just the tail meat, this step-by-step guide will walk you through the process of cleaning langoustines effectively.
1. Rinse Thoroughly How to Split Langoustines
- Why It’s Important: Langoustines may have sand or debris clinging to their shells, especially if they’ve been freshly caught.
- How to Do It:
- Place the langoustines in a colander.
- Rinse them under cold running water, gently rubbing the shells to remove any dirt.
- Let them drain completely before proceeding.
2. Decide on Whole or Peeled Preparation How to Split Langoustines
Before cleaning, decide whether you’ll cook the langoustines whole or remove the meat for use in other recipes.
For Whole Langoustines
- Whole langoustines are perfect for grilling, steaming, or broiling. They require minimal cleaning beyond rinsing, as the shell protects the meat during cooking.
- Remove any visible dirt or debris from the claws and shell for a polished presentation.
For Peeled Langoustine Meat
- Peeling langoustines allows you to use the tail meat for pastas, risottos, and stir-fries. Follow the steps below to remove the meat cleanly.
3. Removing the Head How to Split Langoustines
- Why It’s Done: Detaching the head makes it easier to access the tail meat. The head also contains flavorful juices that can be saved for stocks or sauces.
- How to Do It:
- Hold the langoustine firmly with one hand on the body and the other on the head.
- Twist the head gently until it detaches from the body.
- Set the head aside if you plan to use it for stock or discard it.
4. Peeling the Shell How to Split Langoustines
- Why It’s Done: Removing the shell allows you to access the tender tail meat, the most commonly used part of the langoustine.
- How to Do It:
- Hold the langoustine tail firmly.
- Use your fingers or kitchen shears to crack the shell along the underside.
- Gently peel the shell away from the tail meat, starting from the top and working your way down.
- Avoid tearing the meat by handling it gently.
5. Removing the Vein How to Split Langoustines
- Why It’s Done: The vein is the langoustine’s digestive tract, and while it’s not harmful to eat, it can have a gritty texture.
- How to Do It:
- Locate the black vein running along the back of the tail meat.
- Use a small knife or skewer to lift and pull out the vein.
- Rinse the tail meat under cold water to ensure it’s clean.
6. Cleaning the Claws (Optional) How to Split Langoustines
- Why It’s Done: The claws contain a small amount of flavorful meat, which can be extracted and used in recipes.
- How to Do It:
- Use a seafood cracker or kitchen shears to break open the claws.
- Extract the meat carefully with a skewer or seafood pick.
7. Save the Shells for Stock How to Split Langoustines
- Why It’s Done: The shells and heads are packed with flavor and can be used to create rich seafood stocks, bisques, or sauces.
- How to Do It:
- Rinse the shells thoroughly.
- Store them in an airtight container in the refrigerator for up to 2 days or freeze them for later use.
8. Final Rinse and Storage
- Why It’s Done: Ensuring the langoustines are thoroughly cleaned guarantees a fresh taste in your dish.
- How to Do It:
- Rinse the peeled meat or whole langoustines under cold water one final time.
- Pat them dry with a clean kitchen towel or paper towel.
Tips for Easier Cleaning
- Use Kitchen Shears: Kitchen shears make cracking the shell and removing the meat faster and more efficient.
- Work Over a Clean Surface: Cleaning langoustines can be messy, so use a cutting board or a tray to contain any liquids.
- Handle Gently: Langoustine meat is delicate, so avoid applying excessive force while peeling or cleaning.
Properly cleaned langoustines not only look appealing but also enhance the flavor and texture of your dishes. By following these steps, you’ll ensure your langoustines are ready for grilling, sautéing, boiling, or steaming, making them the star of your seafood creation!
Optional: Splitting Langoustines
Splitting langoustines is an excellent technique for grilling, broiling, or preparing them with flavorful marinades. By cutting them lengthwise, you expose the tender meat, allowing it to absorb seasonings and cook evenly. This method also creates an elegant presentation, making your dish both visually appealing and delicious. Here’s a step-by-step guide to splitting langoustines:
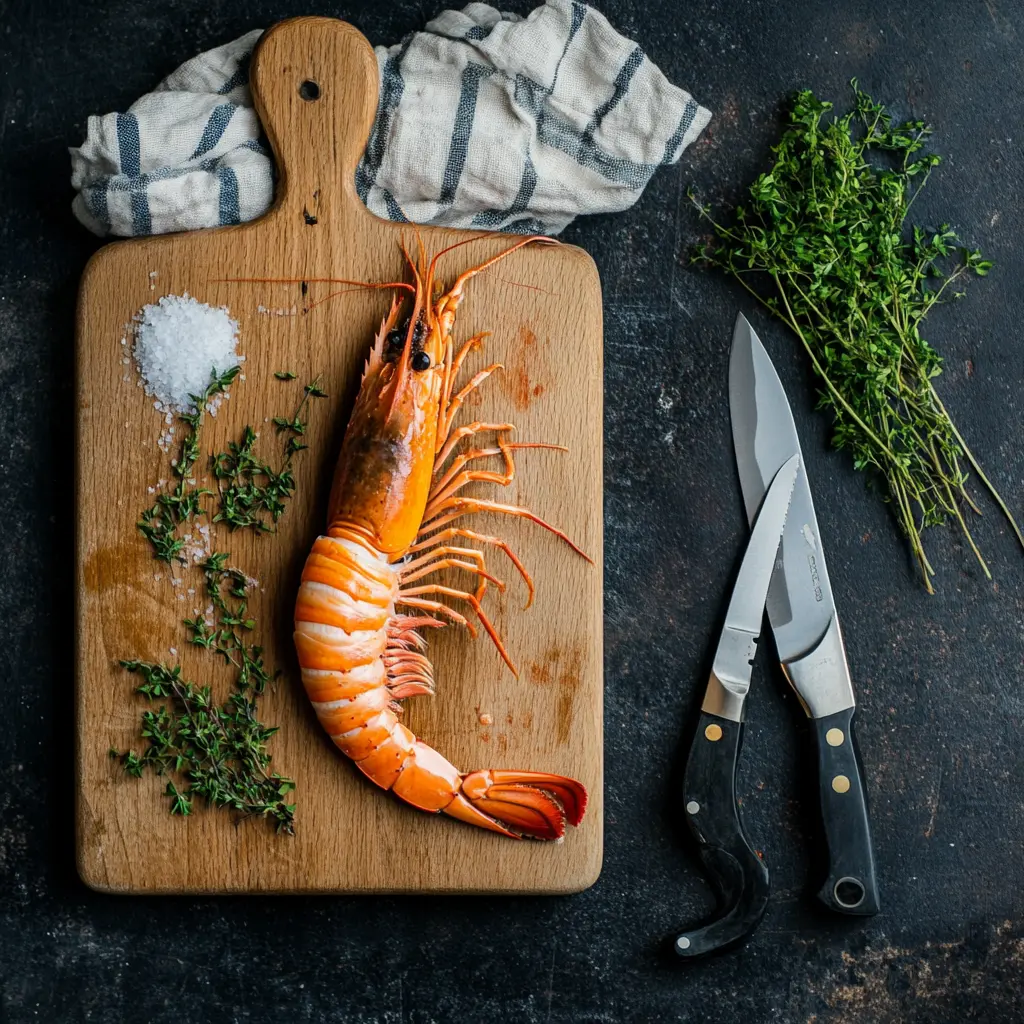
1. Tools You’ll Need
- A sharp chef’s knife or kitchen shears
- A clean cutting board
- A damp kitchen towel to stabilize the langoustines
2. Preparing the Langoustines
- Rinse Thoroughly: Rinse the langoustines under cold running water to remove any sand or debris from the shell.
- Dry Them: Pat the langoustines dry with a clean kitchen towel to prevent slipping while cutting.
3. Positioning the Langoustine
- Lay the langoustine flat on the cutting board with its back (the rounded shell) facing upward.
- Hold it securely with one hand, placing the head and body lengthwise along the board.
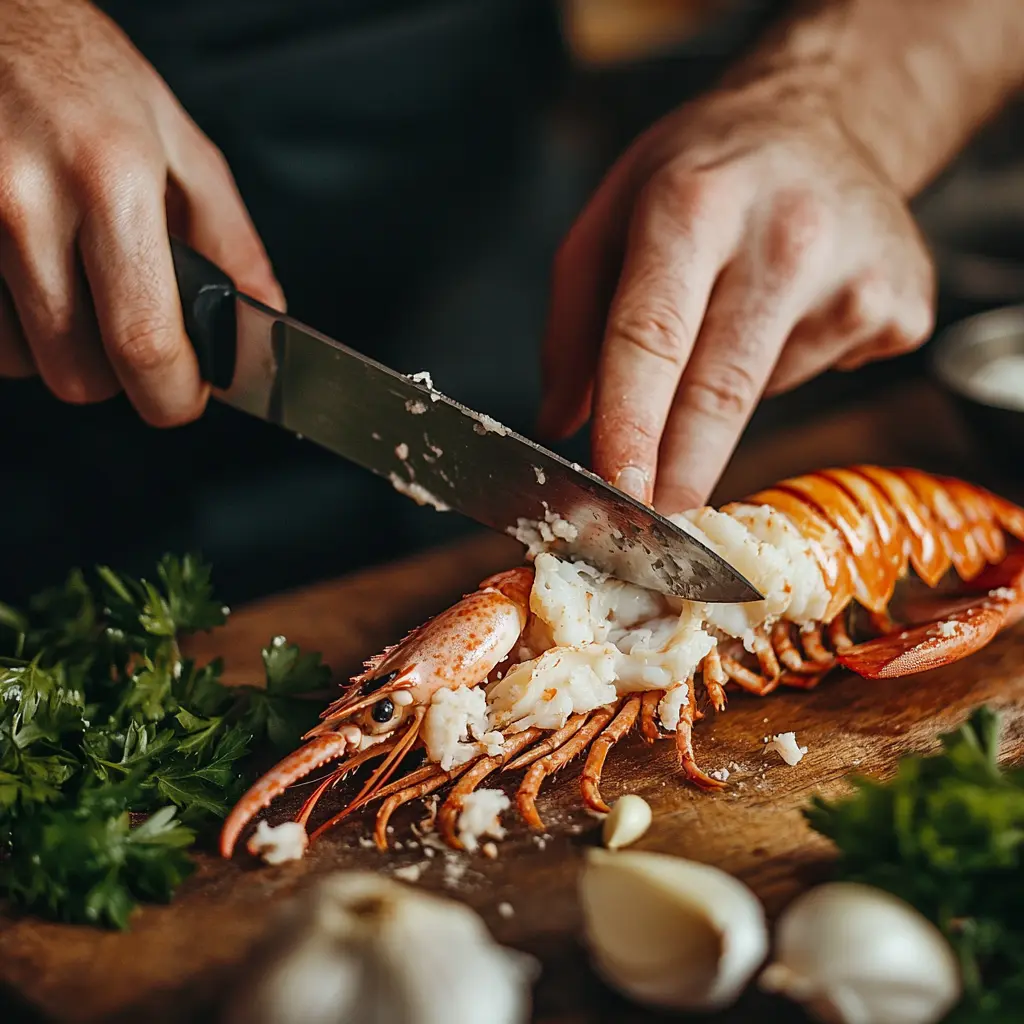
4. Cutting Lengthwise
Using a Knife:
- Position the knife at the center of the head, with the blade pointed toward the tail.
- Press down firmly to slice through the head and shell.
- Continue cutting along the body and tail, splitting the langoustine into two equal halves.
Using Kitchen Shears:
- Insert the shears at the base of the head, cutting along the underside of the langoustine to the tail.
- Flip the langoustine and make a similar cut along the back if needed.
- Gently pull the two halves apart.
5. Removing the Vein
- After splitting, locate the black vein running along the exposed back of the tail meat.
- Use the tip of a knife or a skewer to lift and remove the vein, discarding it.
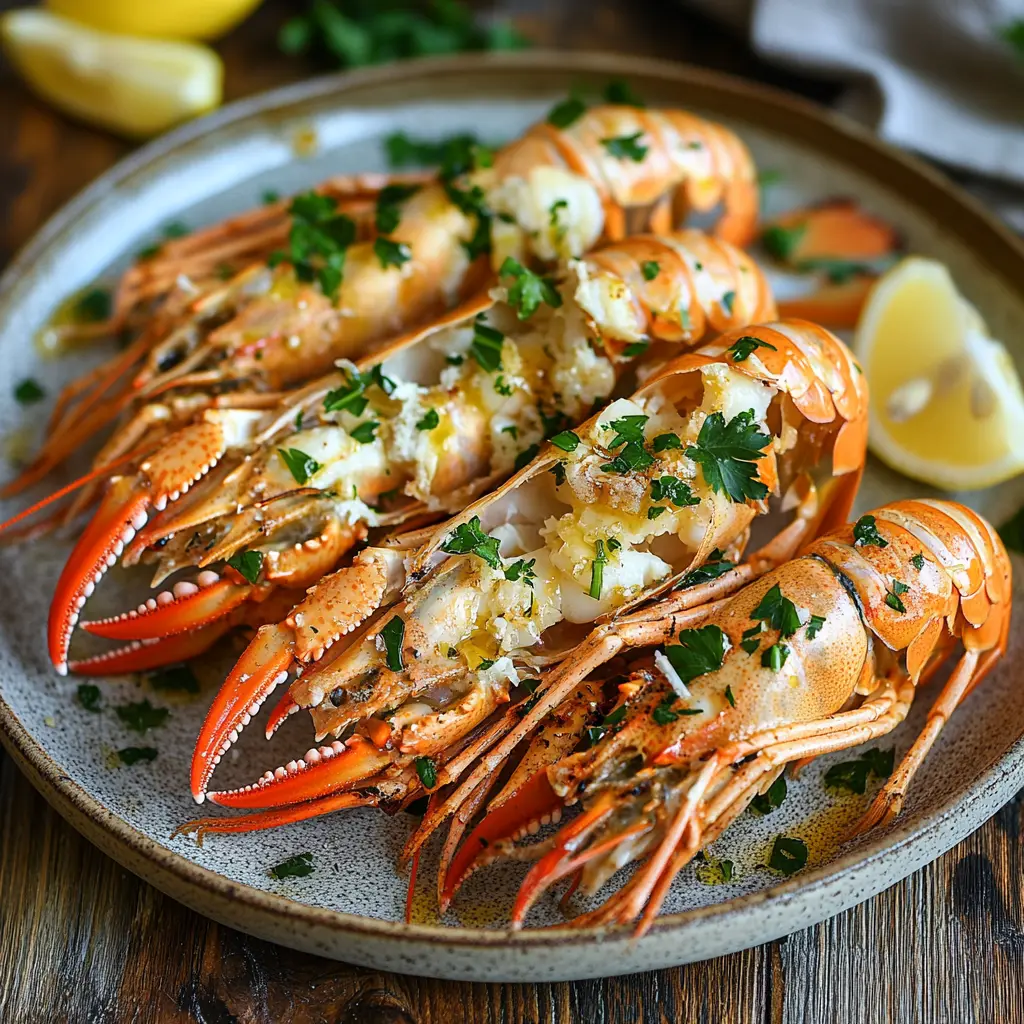
6. Preparing for Cooking
- Season Generously: Brush the exposed meat with olive oil, garlic, butter, or your choice of marinades to enhance the flavor.
- Add Herbs: Sprinkle with fresh herbs like parsley or thyme for an aromatic boost.
- Optional Garnishes: Add a pinch of chili flakes, paprika, or lemon zest for a hint of spice and brightness.
7. Benefits of Splitting Langoustines
- Even Cooking: Splitting ensures the meat cooks evenly, especially on a grill or under a broiler.
- Enhanced Flavor: Exposing the meat allows marinades and seasonings to penetrate deeply, enhancing the overall taste.
- Elegant Presentation: Split langoustines create a sophisticated look, perfect for plating at special occasions or dinner parties.
8. Tips for Splitting Langoustines
- Stabilize the Shell: Place a damp kitchen towel under your cutting board to prevent slipping while cutting.
- Use a Sharp Knife: A dull blade can crush the shell rather than slicing through it cleanly.
- Work Slowly: Apply steady pressure to avoid damaging the delicate meat.
Splitting langoustines is an optional but highly beneficial technique that unlocks their full culinary potential. Whether you’re grilling them with garlic butter or broiling them with spices, this method ensures a flavorful, tender result that will impress your guests.
2. Cooking Methods for Langoustines How to Split Langoustines
Grilling Langoustines
Grilling langoustines is one of the best ways to highlight their natural sweetness and add a smoky flavor.https://www.greatbritishchefs.com/how-to-cook/how-to-cook-langoustine
Ingredients:
- 8 whole langoustines (or tails)
- 3 tbsp olive oil
- 2 cloves garlic, minced
- Salt and pepper to taste
- Fresh parsley and lemon wedges for garnish
Instructions:
- Preheat your grill to medium-high heat.
- Brush langoustines with olive oil and season with minced garlic, salt, and pepper.
- Place langoustines flesh-side down on the grill.
- Cook for 2–3 minutes per side, until the shells turn bright orange and the flesh is opaque.
- Garnish with parsley and serve with lemon wedges.
Boiling Langoustines
Boiling is a quick and easy way to prepare langoustines, especially if you’re using the meat for other dishes.
Ingredients:
- 8–10 whole langoustines
- Water
- 1 tbsp salt
- Lemon slices (optional)
Instructions:
- Bring a large pot of salted water to a boil.
- Add langoustines and reduce heat to a gentle boil.
- Cook for 2–3 minutes, depending on their size.
- Remove langoustines with a slotted spoon and serve immediately or peel for use in other recipes.
Sautéing Langoustines
Sautéing langoustines is perfect for quick dishes like pasta or risotto.
Ingredients:
- 8 langoustine tails, peeled
- 2 tbsp olive oil or butter
- 2 cloves garlic, minced
- 1 tbsp fresh parsley, chopped
- Salt and pepper to taste
Instructions:
- Heat olive oil or butter in a skillet over medium heat.
- Add garlic and sauté until fragrant (about 1 minute).
- Add langoustine tails and cook for 2–3 minutes, stirring occasionally, until the meat is opaque.
- Sprinkle with parsley, season with salt and pepper, and serve immediately.
Steaming Langoustines
Steaming langoustines preserves their natural flavor and delicate texture.
Ingredients:
- 8 whole langoustines
- Water
- Lemon slices or herbs for flavoring
Instructions:
- Bring water to a boil in a steamer pot.
- Place langoustines in the steamer basket.
- Steam for 4–5 minutes, until the shells turn bright orange and the flesh is opaque.
- Serve with melted butter or aioli for dipping.
Broiling Langoustines
Broiling langoustines in the oven gives them a crisp, caramelized finish.
Ingredients:
- 8 langoustines, split lengthwise
- 3 tbsp garlic butter
- Paprika or chili flakes (optional)
Instructions:
- Preheat your broiler to high.
- Place langoustines on a baking sheet, flesh-side up.
- Spread garlic butter evenly over the flesh and sprinkle with paprika or chili flakes.
- Broil for 4–5 minutes, until the flesh is golden and bubbly.
- Serve immediately with a side of crusty bread.
3. Tips for Cooking Langoustines How to Split Langoustines
- Don’t Overcook: Langoustines cook quickly, so keep an eye on them to avoid rubbery meat.
- Season Lightly: Their natural sweetness shines with minimal seasoning like garlic, olive oil, and lemon.
- Save the Shells: Use leftover shells to make a rich seafood stock or bisque.
4. Pairing Langoustines with Other Dishes How to Split Langoustines
- Pasta: Toss langoustine meat with linguine, olive oil, garlic, and fresh basil.
- Risotto: Add sautéed langoustine tails to creamy risotto for a luxurious seafood twist.
- Salad: Top a fresh green salad with grilled langoustines for a light, elegant meal.
Mastering the preparation of exquisite seafood, like these langoustines, brings immense satisfaction to any home cook. For those who also enjoy crafting delightful morning meals, consider elevating your breakfast experience. Learn how to make the perfect sweet & savory homemade McGriddle breakfast sandwich and add another culinary triumph to your repertoire.
FAQs About Cooking Langoustines How to Split Langoustines
1. How do you know when langoustines are cooked?
The shells turn bright orange, and the flesh becomes opaque and firm to the touch.
2. Can you cook frozen langoustines?
Yes, but thaw them completely in the refrigerator or under cold water before cooking.
3. How long do cooked langoustines last?
Cooked langoustines can be stored in an airtight container in the refrigerator for up to 2 days.
4. Do you eat the whole langoustine?
The tail meat is the main edible part, but the claws also contain flavorful meat, and the shells can be used for stock.
Langoustines, also known as Dublin Bay prawns, are a highly prized delicacy in European cuisine, celebrated for their delicate flavor and tender texture. These slender, orange-pink crustaceans are scientifically classified as *Nephrops norvegicus*, a type of Norway lobster, found in the North-East Atlantic Ocean and the Mediterranean Sea.
conclusion
Langoustines are a true culinary delight, offering a perfect balance of sweet flavor, tender texture, and versatility. With a few simple techniques—whether grilling, boiling, sautéing, or steaming—you can create restaurant-quality dishes that highlight the natural elegance of these crustaceans. Their quick cooking time and compatibility with various flavors make them an ideal choice for both everyday meals and special occasions. Now that you know how to prepare langoustines, it’s time to bring this gourmet seafood to your table and enjoy its unparalleled taste. Bon appétit!
How to Split Langoustines: A Step-by-Step Guide Preparation
Ingredients
Method
- Choose Fresh Langoustines: Look for vibrant orange-pink shells, clear and shiny eyes, an intact body, and a mild sea aroma. They should feel firm and slightly moist. Purchase from trusted suppliers, ideally during peak season (May-September). If frozen, ensure vacuum-sealed packaging without ice crystals and labeled "flash-frozen."
- Handle and Transport: Keep langoustines chilled during transport and plan to cook them the same day, or store in the refrigerator for up to 1-2 days.
- Rinse Thoroughly: Place langoustines in a colander and rinse under cold running water, gently rubbing shells to remove sand or debris. Drain completely.
- Decide on Preparation: Decide whether to cook them whole or peeled. For whole, remove visible dirt. For peeled, proceed to remove head and shell.
- Remove the Head (if peeling/splitting): Hold the langoustine firmly, one hand on the body, one on the head. Twist gently until the head detaches. Save for stock or discard.
- Peel the Shell (if peeling/splitting): Hold the tail firmly. Use fingers or kitchen shears to crack the shell along the underside and gently peel it away from the tail meat, working from top to bottom.
- Remove the Vein (if peeling/splitting): Locate the black vein along the back of the tail meat. Use a small knife or skewer to lift and pull it out. Rinse the tail meat under cold water.
- Clean Claws (Optional): Use a seafood cracker or kitchen shears to break open claws and extract meat with a skewer or pick.
- Split Langoustines (Optional, for grilling/broiling): Lay the langoustine flat on a cutting board, back facing upward. Secure it with one hand.
- Cut Lengthwise: Position a sharp chef’s knife at the center of the head, pointing toward the tail, and press down firmly to slice through, splitting the langoustine into two halves. Alternatively, use kitchen shears to cut along the underside from head to tail.
- Devein After Splitting: After splitting, remove any visible black vein from the exposed meat using the tip of a knife or a skewer.
- Prepare for Cooking: Season the exposed meat generously with olive oil, minced garlic, salt, and pepper. Add fresh herbs like parsley, or optional garnishes like chili flakes, paprika, or lemon zest.
- Cook Using Desired Method: Choose one of the following methods: * Grilling: Preheat grill to medium-high. Place langoustines flesh-side down. Cook 2-3 minutes per side until shells are bright orange and flesh is opaque. * Boiling: Bring salted water to a boil. Add langoustines, reduce to gentle boil. Cook 2-3 minutes. * Sautéing: Heat olive oil/butter in skillet over medium heat. Sauté garlic 1 minute. Add peeled tails, cook 2-3 minutes until opaque. * Steaming: Bring water to boil in steamer. Place langoustines in basket. Steam 4-5 minutes until shells are bright orange and flesh is opaque. * Broiling: Preheat broiler to high. Place split langoustines on baking sheet, flesh-side up. Spread garlic butter, sprinkle paprika (optional). Broil 4-5 minutes until golden and bubbly.
- Serve Immediately: Garnish and serve the cooked langoustines.