
How to Perfectly Make Crème Brulee with a Blowtorch? Classic crème brûlée recipe, is a French dessert, translates to “burnt cream,” a nod to its crowning glory a crisp, caramelizing sugar with a blowtorch that contrasts beautifully with its creamy custard base. This delicate dessert is a staple in fine dining, known for its rich flavor and satisfying crack as the caramel shatters under your spoon.https://royalesrecipes.com/creme-brulee-the-classic-french-dessert-recipe/
While the custard itself is relatively simple to prepare, achieving that iconic caramelized layer can be a challenge without the right technique. Enter the blowtorch: a versatile kitchen tool that ensures precise control over the caramelization process, transforming granulated sugar into a glossy, amber crust without compromising the custard underneath.
In this guide, we’ll explore the essentials of making crème brûlée from scratch, focusing on using a blowtorch to perfect this indulgent dessert. Whether you’re a seasoned home chef or a beginner, this step-by-step walkthrough will help you master the art of crème brûlée.
In This Recipe
Ingredients and Tools Needed
Ingredients and Tools Needed
Creating the perfect Crème brûlée with blowtorch requires a combination of carefully selected ingredients and the right tools. This section covers everything you’ll need to prepare this dessert with confidence.
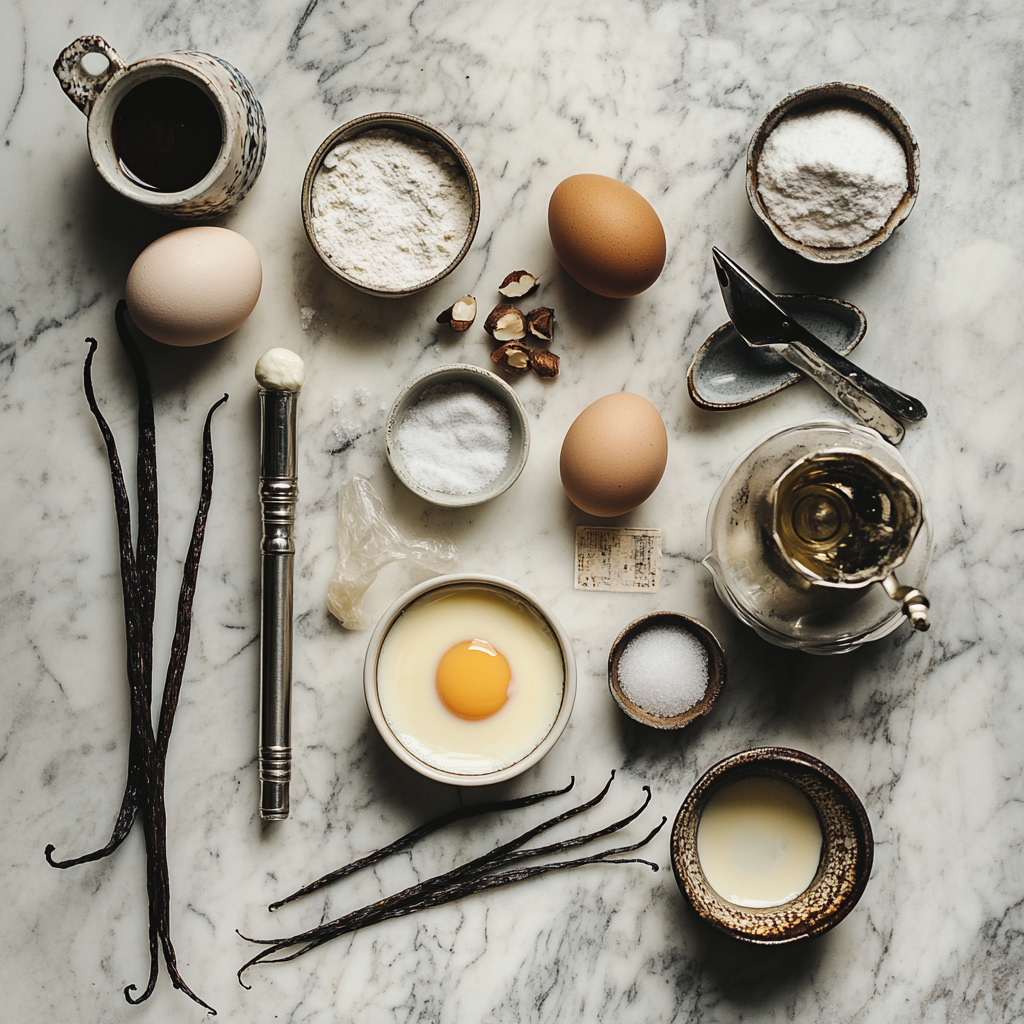
Essential Ingredients
- Heavy Cream
- The base of the custard, providing richness and a velvety texture. Opt for high-quality cream with at least 36% fat content.
- Egg Yolks
- Key to the custard’s smooth consistency. Separate the yolks carefully to avoid any whites in the mixture.
- Granulated Sugar
- Used for sweetening the custard and creating the caramelized topping. Fine granulated sugar works best for even melting.
- Vanilla
- A classic flavor for crème brûlée with Blowtorch. Use vanilla beans for authentic flavor or high-quality vanilla extract as an alternative.
- Pinch of Salt
- Balances the sweetness and enhances the custard’s flavors.
Tools for Making Crème Brûlée with Blowtorch
- Blowtorch
- The star of this recipe. A kitchen blowtorch provides precise heat control to caramelize sugar without overheating the custard. Ensure your torch has adjustable flame settings for versatility.
- Ramekins
- Small ceramic dishes designed for individual servings. Their heat resistance makes them ideal for baking custards evenly.
- Baking Dish or Tray
- Used for the water bath, ensuring the custard bakes gently and evenly without curdling.
- Mixing Bowls and Whisks
- Essential for combining the ingredients without incorporating too much air, which could create bubbles in the custard.
- Kitchen Thermometer (Optional)
- Helps monitor the cream’s temperature when heated. Keeping it below boiling ensures a smooth texture.
- Fine Sieve
- Straining the custard mixture removes any impurities or bubbles, creating a silky final product.
Preparation Tips
- Preheat Your Oven
- Set your oven to 325°F (163°C) to ensure even baking of the custard.
- Prepare the Water Bath
- Use boiling water for the bain-marie (water bath) to maintain a stable temperature during baking.
- Test Your Blowtorch
- Familiarize yourself with the torch settings before caramelizing the sugar to ensure control over the flame.
With your ingredients and tools ready, you’re all set to begin crafting your crème brûlée. In the next section, we’ll walk through the step-by-step process of making this elegant dessert.
Step-by-Step Guide to Making Crème Brûlée
Step-by-Step Guide to Making Crème Brûlée
Creating crème brûlée with Blowtorch is a rewarding process, combining precision and artistry. Follow this detailed guide to achieve restaurant-quality results at home.https://www.tinacooking.com/2024/11/08/how-to-make-creme-brulee-with-a-blowtorch/
Preparing the Custard
- Heat the Cream
- In a medium saucepan, pour the heavy cream and add the vanilla (either split vanilla beans or a teaspoon of vanilla extract). Heat over medium-low heat until the cream is hot but not boiling. Look for small bubbles around the edges. Remove from heat and let it steep for 5–10 minutes to infuse the flavor.
- Mix the Egg Yolks and Sugar
- In a mixing bowl, whisk together the egg yolks and granulated sugar until the mixture becomes pale yellow and slightly thickened. Be gentle to avoid incorporating too much air, which could create bubbles in the custard.
- Temper the Egg Mixture
- Slowly pour a small amount of the warm cream into the egg mixture, whisking constantly to avoid cooking the eggs. Gradually add the rest of the cream, continuing to whisk. This step ensures the yolks blend smoothly without curdling.
- Strain the Custard
- Pass the custard mixture through a fine sieve into a clean bowl. This removes any impurities and creates a silky texture.
Baking the Custard
- Prepare the Ramekins
- Arrange your ramekins in a deep baking dish or tray. Ensure there’s enough space between them for even heat distribution.
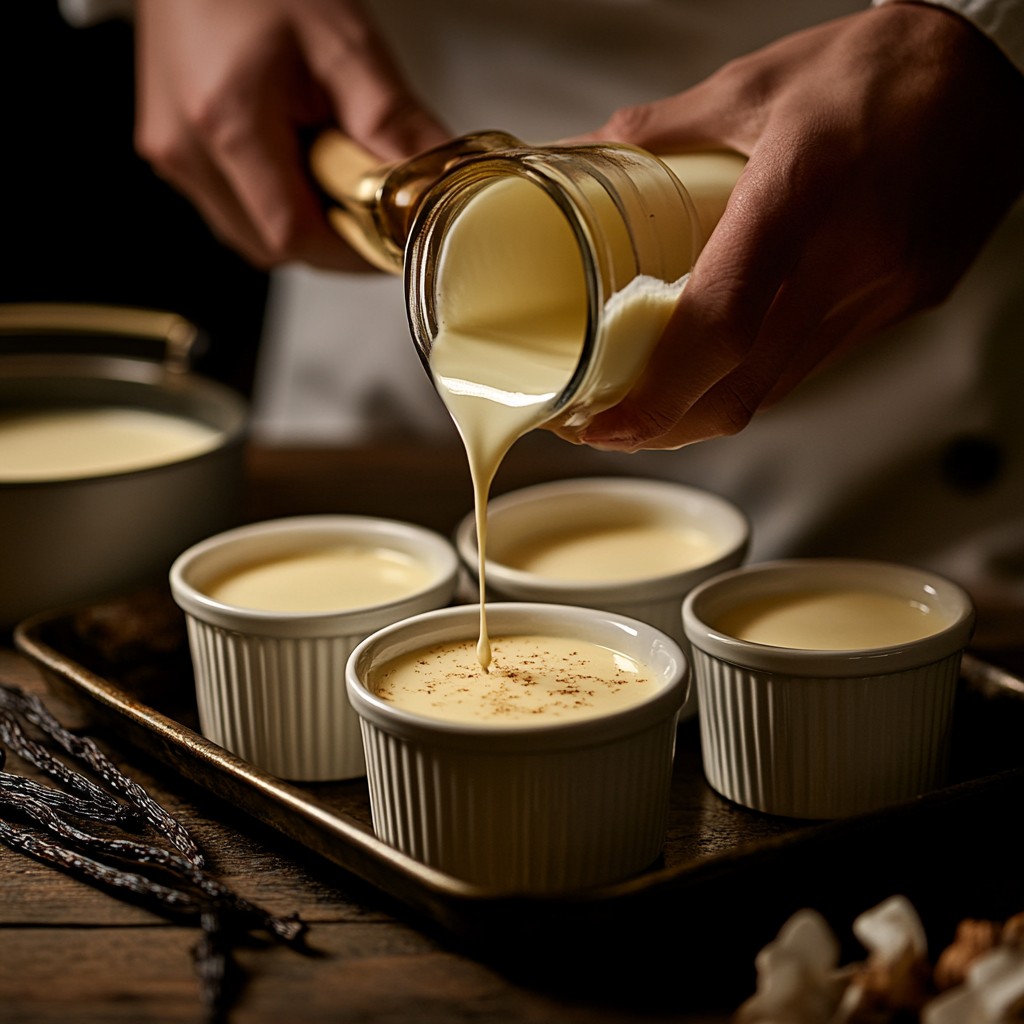
- Fill the Ramekins
- Pour the strained custard mixture into the ramekins, filling them about three-quarters full.
- Set Up the Water Bath
- Carefully pour hot water into the baking dish until it reaches halfway up the sides of the ramekins. This water bath helps the custard bake gently and evenly.
- Bake to Perfection
- Place the dish in a preheated oven (325°F or 163°C). Bake for 35–45 minutes, or until the edges are set but the center still jiggles slightly when shaken. Overbaking can cause the custard to crack or curdle.
- Cool the Custard
- Remove the ramekins from the water bath and let them cool to room temperature. Cover each with plastic wrap and refrigerate for at least 4 hours, or preferably overnight, to fully set the custard.
Caramelizing the Sugar
- Prepare the Sugar Layer
- Sprinkle an even layer of granulated sugar (about 1–2 teaspoons) over the surface of each chilled custard. For even coverage, tilt the ramekin and gently tap to distribute the sugar.
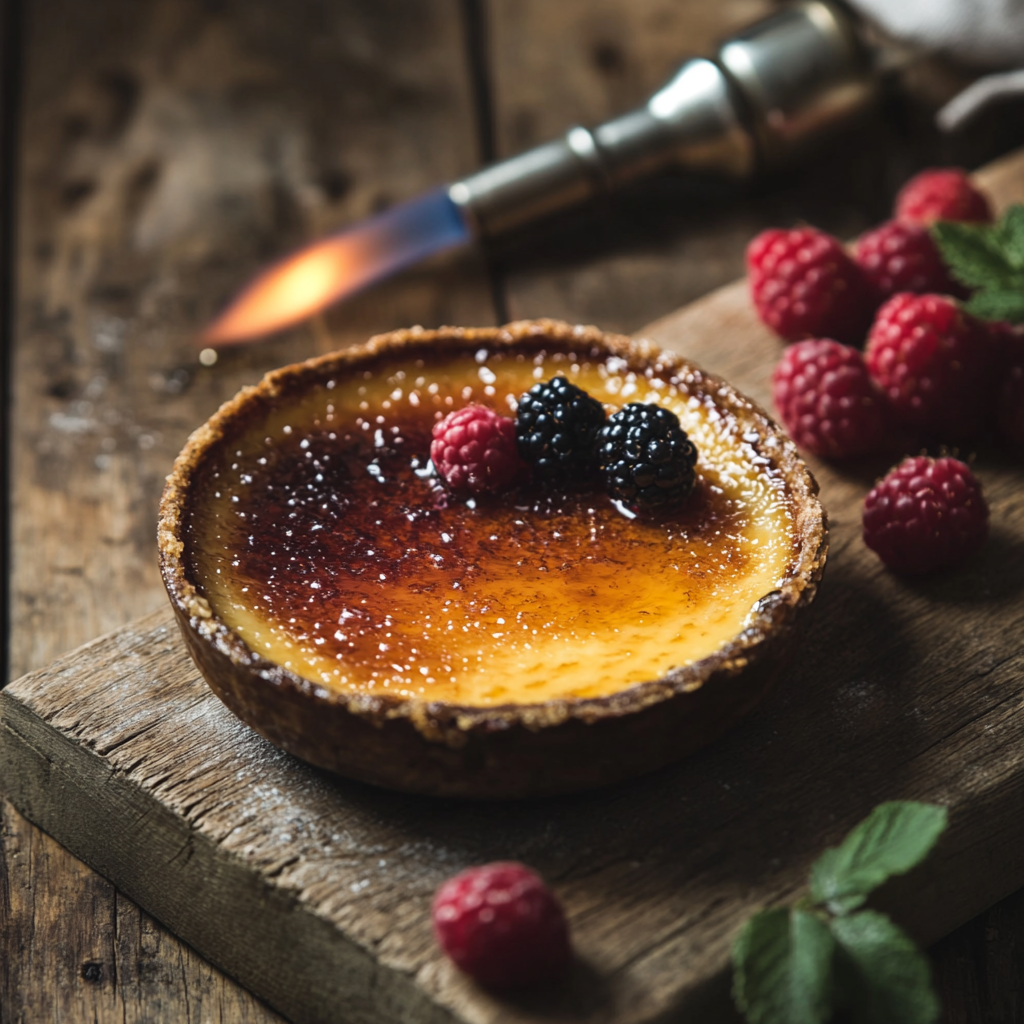
- Use the Blowtorch
- Ignite your blowtorch and hold it about 2 inches from the sugar surface. Move the flame in a circular motion to melt the sugar evenly. Watch closely as the sugar transforms into a golden, glass-like crust.
- Cool Briefly
- Allow the caramel to harden for about 1–2 minutes before serving. The crust will cool into a crisp layer that cracks under a spoon.
Serving Suggestions
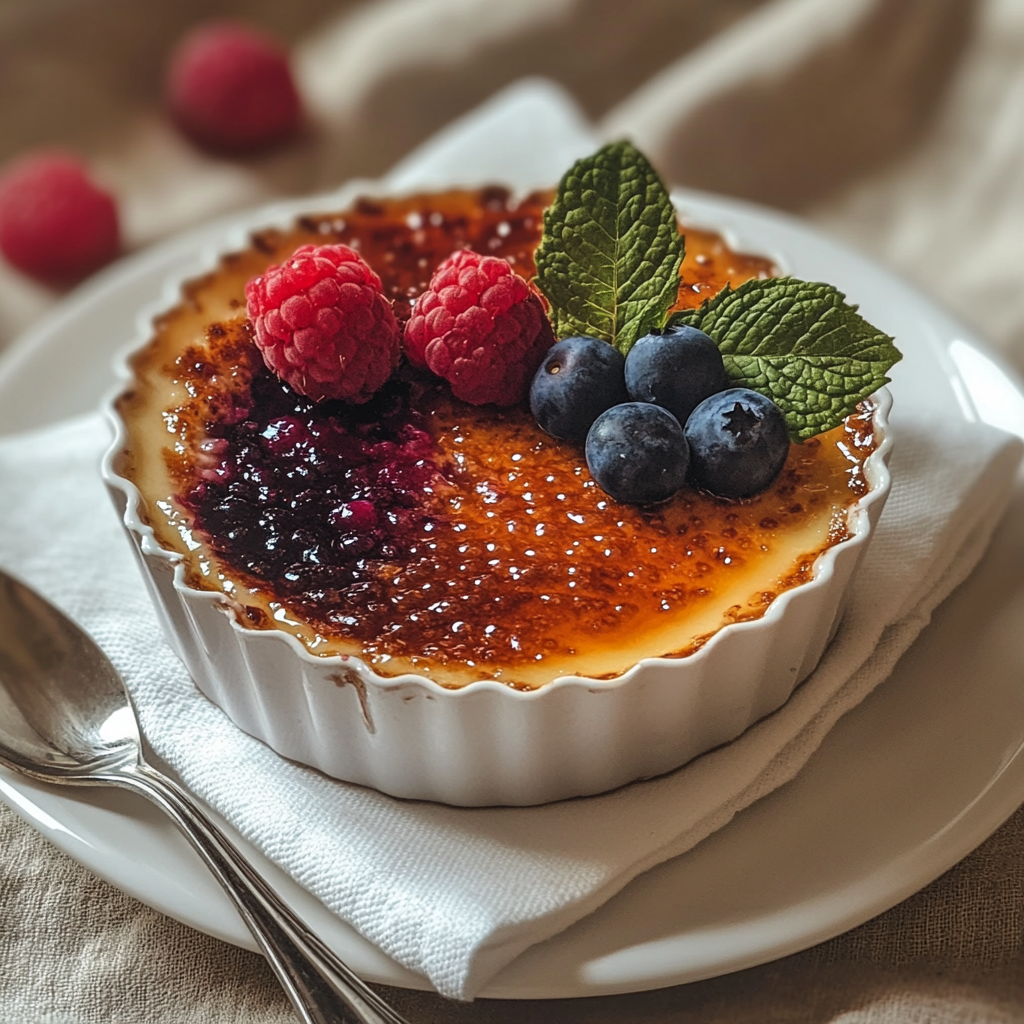
Crème brûlée with Blowtorch is best enjoyed immediately after torching, as the contrast between the warm caramel crust and the chilled custard creates the ultimate dessert experience. Pair it with fresh berries or a drizzle of fruit coulis for added flair.
In the next section, we’ll focus on mastering the art of caramelizing sugar with your blowtorch, including tips and techniques for achieving perfection.
The Art of Caramelizing Sugar
The Art of Caramelizing Sugar
The crowning glory of crème brûlée lies in its caramelized sugar crust. Mastering this step requires precision and patience, but with the right techniques and a trusty blowtorch, you can achieve the perfect golden glaze every time.
Choosing the Right Sugar
- Granulated Sugar
- Fine, granulated sugar is ideal for crème brûlée as it melts evenly under the heat of a blowtorch. Avoid powdered sugar or larger granules, which can burn unevenly.
- Flavor Enhancements
- For a twist, consider mixing granulated sugar with a pinch of cinnamon, nutmeg, or even citrus zest for an aromatic caramel layer.
Torch Techniques for Perfect Caramelization
- Preparation Is Key
- Ensure the custard is fully chilled before adding sugar. A warm custard will destabilize under the heat, leading to uneven caramelization.
- Even Sugar Layer
- Sprinkle a consistent, thin layer of sugar over the custard’s surface. Tap the ramekin lightly to spread the sugar evenly, ensuring there are no lumps or gaps.
- Flame Position
- Hold the blowtorch about 1–2 inches from the sugar surface. Start at the edges and work toward the center, using a slow, circular motion. This prevents over-caramelizing one area while others remain untouched.
- Adjusting the Flame
- Use a medium flame setting for better control. A high flame might scorch the sugar too quickly, while a low flame may not melt it evenly.
- Watch for Color
- Keep an eye on the sugar as it transitions from white to a glossy amber hue. Stop torching when you achieve your desired color, whether it’s a light golden brown or a deep caramel.
Common Mistakes to Avoid
- Overheating the Sugar
- Prolonged torching can cause the sugar to burn, resulting in a bitter flavor. Move the torch continuously to avoid concentrating heat in one spot.
- Uneven Coverage
- Clumps or uneven sugar distribution can lead to inconsistent caramelization. Always smooth the sugar layer before torching.
- Melting the Custard
- Holding the flame too close for too long can warm or liquefy the custard underneath. Maintain a steady distance and keep the flame in motion.
Testing Your Blowtorch
If you’re new to using a blowtorch, it’s a good idea to practice beforehand. Sprinkle sugar on a spare ramekin or even a small plate and experiment with the torch settings and technique. This helps you get a feel for the tool before working on the actual dessert.
Beyond the Blowtorch: Alternative Caramelizing Methods
- Oven Broiler
- If you don’t have a blowtorch, you can use your oven’s broiler setting. Place the ramekins on a baking tray, sprinkle with sugar, and broil until caramelized. Watch closely to avoid burning.
- Specialized Tools
- Caramelizing irons or salamanders are traditional tools for creating the crust, though they are less common in home kitchens.
A Note on Presentation
A perfectly caramelized crème brûlée should have an even, glossy finish that shatters with a satisfying crack under a spoon. Serve immediately for the best textural contrast between the crisp crust and creamy custard.
Up next, we’ll discuss additional tips and tricks to help you master crème brûlée, from troubleshooting common issues to experimenting with flavors.
Tips for Mastering Crème Brûlée
Tips for Mastering Crème Brûlée
Creating crème brûlée is an art, and with practice, you can achieve consistent, restaurant-quality results. This section delves into expert tips, flavor variations, and solutions to common issues, ensuring your dessert always impresses.
Tricks for Consistent Results
- Temperature Control
- Always keep your cream below boiling when heating. Excessive heat can cause the eggs to scramble during mixing.
- Use an oven thermometer to ensure your baking temperature is accurate, as even slight variations can affect the custard’s texture.
- Chill Time
- Allow the custard to chill thoroughly before torching. A well-set custard provides a stable base for caramelizing the sugar.
- For best results, refrigerate overnight to deepen the flavors and achieve the perfect consistency.
- Avoid Air Bubbles
- Whisk the ingredients gently to minimize air bubbles. Straining the custard through a fine sieve further eliminates any foam or impurities.
- If bubbles form on the custard’s surface before baking, skim them off with a spoon for a smooth finish.
Experimenting with Flavors
While traditional crème brûlée features vanilla, you can infuse the custard with a variety of flavors to suit your taste or the occasion.
- Citrus Zest
- Add the zest of orange, lemon, or lime to the cream for a refreshing twist.
- Spices
- Infuse the cream with cinnamon sticks, star anise, or cardamom pods for a warm, spiced profile.
- Chocolate
- Melt high-quality dark or white chocolate into the cream before mixing with the eggs for a decadent variation.
- Liquors and Extracts
- Incorporate a splash of Grand Marnier, Amaretto, or almond extract to elevate the custard’s flavor.
- Fruit Purees
- Swirl in raspberry, mango, or passionfruit puree for a fruity, colorful presentation.
Troubleshooting Common Issues
- Runny Custard
- Cause: Undercooking or incorrect ingredient ratios.
- Solution: Ensure the custard jiggles slightly when shaken but is set around the edges before removing from the oven.
- Cracked Custard
- Cause: Overbaking or baking at too high a temperature.
- Solution: Use a water bath and monitor the baking process closely.
- Burnt Sugar Crust
- Cause: Excessive torching or uneven sugar distribution.
- Solution: Keep the blowtorch in motion and use a thin, even layer of sugar.
- Soggy Top Layer
- Cause: Humidity softening the caramel crust.
- Solution: Serve immediately after caramelizing for the best crunch.
Advanced Presentation Ideas
- Toppings
- Garnish with fresh berries, edible flowers, or a dusting of powdered sugar for visual appeal.
- Layering
- Add a layer of fruit compote or chocolate ganache beneath the custard for an extra surprise.
- Serving Vessels
- Experiment with ramekin shapes, such as oval or heart-shaped dishes, to enhance the presentation.
Mastering crème brûlée takes time, but each attempt brings you closer to perfection. In the next section, we’ll address frequently asked questions to resolve lingering doubts and help you refine your technique.
Part 6: Frequently Asked Questions (FAQs)
FAQs
To help you perfect your crème brûlée and address common concerns, here are answers to frequently asked questions about this classic dessert.
Why is my crème brûlée not setting?
If your crème brûlée remains runny after baking, it’s likely due to:
- Undercooking
- Ensure the custard jiggles only slightly in the center and is set around the edges before removing it from the oven.
- Incorrect Temperature
- Bake at 325°F (163°C) and use a water bath to prevent overheating or uneven cooking.
Can I make crème brûlée without a blowtorch?
Yes, you can caramelize the sugar using these alternatives:
- Oven Broiler
- Place the ramekins under the broiler for a few minutes, keeping a close eye to avoid burning the sugar.
- Caramelizing Iron
- A traditional tool heated on a stovetop, pressed onto the sugar until it melts.
While these methods work, a blowtorch provides the best control for even caramelization.
What does crème brûlée taste like?
Crème brûlée has a luxurious taste that’s a delightful balance of creamy sweetness and caramelized richness. The custard base is silky, rich, and vanilla-flavored, often with a subtle hint of creaminess and egginess that melts in your mouth. The crowning glory is the crisp, caramelized sugar topping, which adds a satisfying crunch and a deep, toasty sweetness.
When eaten together, the smooth custard and crackling topping create a perfect harmony of textures and flavors like a dessert that feels indulgent yet refined. Some variations may have a touch of citrus, coffee, or liqueur added to the custard, which can enhance its flavor complexity.
How far in advance can I prepare crème brûlée?
Crème brûlée can be prepared up to 2 days in advance. Follow these tips:
- Prepare the Custard
- Bake and refrigerate the custard without the caramelized sugar topping.
- Torch Before Serving
- Add the sugar layer and caramelize it just before serving to maintain the crust’s crispness.
Why is my caramel crust bitter?
A bitter crust results from burning the sugar. To prevent this:
- Use Even Heat
- Move the blowtorch in a circular motion to avoid overheating one spot.
- Monitor Color
- Stop torching once the sugar turns a golden amber color.
Can I freeze crème brûlée?
While freezing crème brûlée is not ideal due to potential texture changes, you can freeze the baked custard (without the sugar topping). Follow these steps:
- Cool Completely
- Refrigerate the custard until fully chilled before freezing.
- Use Airtight Containers
- Cover ramekins tightly with plastic wrap and aluminum foil to prevent freezer burn.
- Thaw Gradually
- Thaw in the refrigerator overnight and torch the sugar topping before serving.
What makes crème brûlée different from other custards?
Crème brûlée stands out due to its caramelized sugar crust, which adds a delightful contrast in texture. Unlike other custards, it’s served chilled with a warm, freshly torched topping, making it unique in both flavor and presentation.
Can I make crème brûlée dairy-free?
Yes! Substitute the heavy cream with coconut cream, almond milk, or oat milk for a dairy-free version. Note: The custard’s texture and flavor may vary slightly.
Conclusion
Crème brûlée is more than just a dessert it’s a culinary experience that combines simple ingredients, meticulous technique, and a touch of creativity. By mastering the use of a blowtorch and experimenting with flavors, you can elevate this classic dish into a signature masterpiece.
Remember, practice makes perfect. With each attempt, you’ll gain confidence and refine your skills, ensuring your crème brûlée becomes a crowd-pleasing favorite. Now, grab your blowtorch, prepare your ingredients, and start crafting this iconic French treat today!
How to Perfectly Make Crème Brulee with a Blowtorch
Ingredients
Method
- Preheat your oven to 325°F (163°C). Prepare boiling water for the bain-marie (water bath).
- Heat the Cream: In a medium saucepan, pour the heavy cream and add the vanilla (either split vanilla beans or a teaspoon of vanilla extract). Heat over medium-low heat until the cream is hot but not boiling (look for small bubbles around the edges). Remove from heat and let it steep for 5–10 minutes to infuse the flavor.
- Mix the Egg Yolks and Sugar: In a mixing bowl, whisk together the egg yolks and granulated sugar until the mixture becomes pale yellow and slightly thickened. Whisk gently to avoid incorporating too much air.
- Temper the Egg Mixture: Slowly pour a small amount of the warm cream into the egg mixture, whisking constantly to avoid cooking the eggs. Gradually add the rest of the cream, continuing to whisk.
- Strain the Custard: Pass the custard mixture through a fine sieve into a clean bowl to remove any impurities and create a silky texture.
- Prepare the Ramekins: Arrange your ramekins in a deep baking dish or tray, ensuring there’s enough space between them for even heat distribution.
- Fill the Ramekins: Pour the strained custard mixture into the ramekins, filling them about three-quarters full.
- Set Up the Water Bath: Carefully pour hot water into the baking dish until it reaches halfway up the sides of the ramekins. This helps the custard bake gently and evenly.
- Bake to Perfection: Place the dish in the preheated oven (325°F or 163°C). Bake for 35–45 minutes, or until the edges are set but the center still jiggles slightly when shaken. Avoid overbaking to prevent cracking or curdling.
- Cool the Custard: Remove the ramekins from the water bath and let them cool to room temperature. Cover each with plastic wrap and refrigerate for at least 4 hours, or preferably overnight, to fully set the custard.
- Prepare the Sugar Layer: Sprinkle an even layer of fine granulated sugar (about 1–2 teaspoons) over the surface of each chilled custard. For even coverage, tilt the ramekin and gently tap to distribute the sugar.
- Use the Blowtorch: Ignite your blowtorch and hold it about 1–2 inches from the sugar surface. Move the flame in a slow, circular motion to melt the sugar evenly. Watch closely as the sugar transforms into a golden, glass-like crust.
- Cool Briefly: Allow the caramel to harden for about 1–2 minutes before serving. The crust will cool into a crisp layer that cracks under a spoon.