
The spring afternoon sun streamed into our kitchen, casting long shadows across the floor. My three little ones, sticky with the remnants of their playdate, burst through the door, demanding “something sweet!” I smiled, a familiar request. My usual go-to was classic lemon bars, but that day, I had a bounty of fresh strawberries begging to be used.
Inspiration struck like a bolt of sunshine: why not combine them? That afternoon, a new family favorite was born: these incredible strawberry lemon bars. They were an instant hit, the perfect balance of tart and sweet, bright and comforting.
The kids devoured them, their faces smeared with red and yellow goodness. Since then, making this strawberry lemon bar recipe has become a cherished tradition. Each bite brings back that sunny afternoon, the laughter, and the simple joy of sharing something delicious. These lemon strawberry bars are more than just a dessert; they are a taste of pure happiness, a little slice of love from my kitchen to yours.
Why You’ll Love This Recipe
You need this recipe in your life! First, these strawberry lemon bars are incredibly simple to make, even for novice bakers. You won’t find complicated techniques here.
Second, the flavor profile is simply divine. The zesty tang of fresh lemon perfectly complements the sweet burst of ripe strawberries, all nestled on a buttery shortbread crust. It is a harmonious symphony of tastes.
Third, these lemon strawberry bars are absolute crowd-pleasers. Take them to a potluck, a picnic, or serve them at your next family gathering. Watch them disappear!
Finally, they embody the essence of spring and summer. They bring a vibrant freshness to any table. You will adore the bright colors and refreshing taste of these delightful treats.
Ingredients You’ll Need
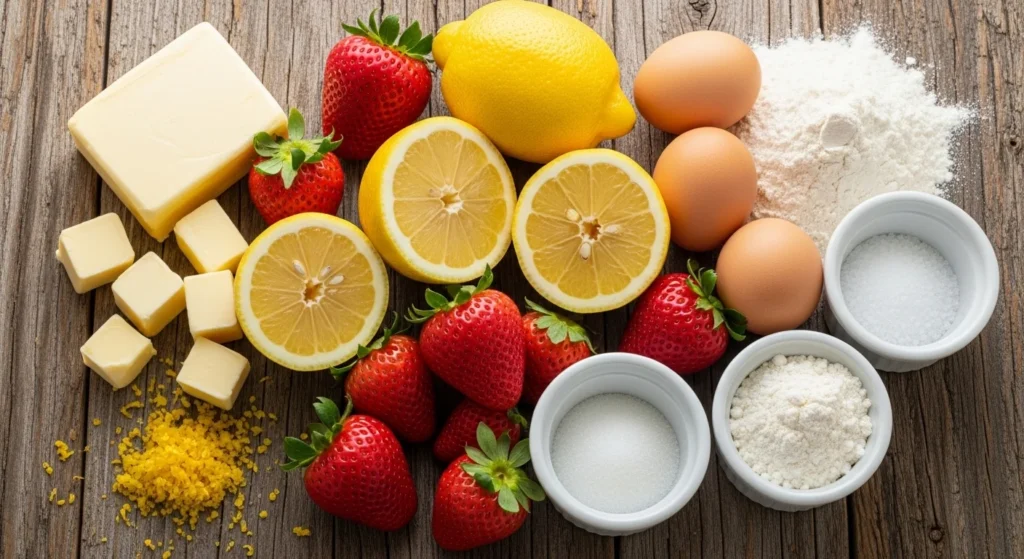
Gather your ingredients for these amazing strawberry lemon bars. We use simple, everyday items. Fresh is always best, especially for the lemons and strawberries.
This list ensures you have everything for a perfect batch.
| Ingredient | Quantity | Notes |
| :———————- | :————– | :—————————————- |
| For the Shortbread Crust: | | |
| All-purpose flour | 2 cups | Unbleached is preferred |
| Granulated sugar | 1/2 cup | |
| Salt | 1/4 teaspoon | Enhances flavor |
| Unsalted butter, cold | 1 cup (2 sticks) | Cut into cubes for easy blending |
| For the Lemon Filling: | | |
| Granulated sugar | 2 cups | Adjust to your sweetness preference |
| All-purpose flour | 1/4 cup | Thickens the filling |
| Large eggs | 4 | Room temperature works best |
| Lemon zest | 2 tablespoons | About 2-3 large lemons, finely grated |
| Fresh lemon juice | 1/2 cup | From 2-3 large lemons, no pulp |
| For the Strawberry Swirl: | | |
| Fresh strawberries | 1 cup | Hulled and finely diced |
| Granulated sugar | 1 tablespoon | Optional, for extra sweetness |
| Lemon juice | 1 teaspoon | Brightens strawberry flavor |
| For Dusting (Optional): | | |
| Powdered sugar | As needed | For a beautiful finish |
Substitutions & Variations
These strawberry lemon bars offer fantastic flexibility for customization. Do not hesitate to make them your own!
* Fruit Swaps: No strawberries? No problem! Try raspberries, blueberries, or even a mix of berries.
A pureed mango swirl would also be delightful. For unique lemon bars with strawberry flavor, consider a thin layer of strawberry preserves for a quicker swirl.
* Crust Alternatives: For a gluten-free version, simply use a 1:1 gluten-free baking flour blend in the crust.
You can also add 1/2 cup of almond flour to the crust for a slightly nutty flavor. Graham cracker crust is another easy option if you want to skip the shortbread entirely.
* Citrus Zest: While lemon is classic for these strawberry lemon bars, experiment with lime or orange zest in the filling.
A mix of lemon and lime provides an extra zing.
* Dairy-Free Option: Use a high-quality plant-based butter alternative for the crust. For the filling, some recipes successfully use plant-based milk and egg substitutes, though the texture might vary slightly.
* Extra Creaminess: Stir in 2 tablespoons of cream cheese or mascarpone into the lemon filling before baking for an even richer, smoother texture.
* Layered Look: Instead of swirling, you can pour the lemon filling over the crust, then dollop small spoonfuls of the strawberry puree on top. Use a skewer to gently pull through the strawberry for distinct lines, creating a beautiful layered effect on your lemon strawberry bars.
The versatility of these bars, allowing for various fruit swaps and crust alternatives, makes them suitable for almost any occasion or dietary preference. If you’re looking for more ways to create adaptable and delicious meals that are perfect for on-the-go enjoyment, explore our guide on Box Lunch: A Guide to Convenient, Healthy, and Delicious Meals.
Step-by-Step Instructions
Making these delightful strawberry lemon bars is a straightforward process. Follow these steps for perfect results every time.
1. Prepare the Crust: Preheat your oven to 350°F (175°C). Line a 9×13-inch baking pan with parchment paper, leaving an overhang on the sides for easy removal.
In a medium bowl, whisk together the flour, 1/2 cup sugar, and salt. Add the cold, cubed butter. Using a pastry blender or your fingertips, cut the butter into the flour mixture until it resembles coarse crumbs.
Press this mixture evenly into the bottom of the prepared pan. Bake for 18-20 minutes, or until the edges are lightly golden. Remove from the oven and set aside.
Keep the oven on.
2. Make the Strawberry Swirl: While the crust bakes, prepare the strawberry swirl.
In a small bowl, combine the finely diced strawberries, 1 tablespoon sugar (if using), and 1 teaspoon lemon juice. Mash them gently with a fork or pulse briefly in a food processor until it forms a chunky puree. You want some texture.
3. Whip Up the Lemon Filling: In a large bowl, whisk together the 2 cups granulated sugar and 1/4 cup flour. This helps prevent the sugar from clumping and creates a smooth filling.
Add the eggs, lemon zest, and lemon juice. Whisk until the mixture is completely smooth and well combined. Do not overmix; just combine thoroughly.
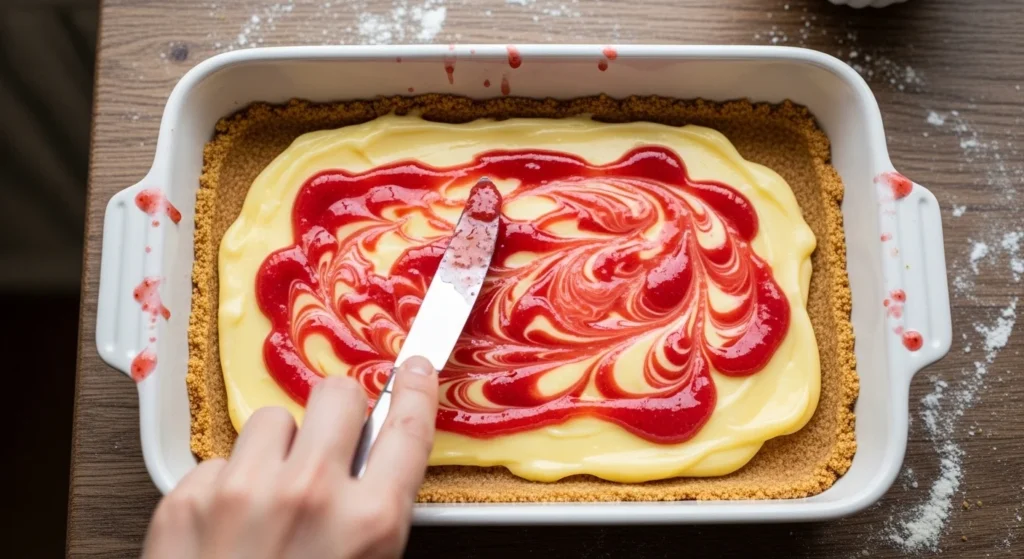
4. Assemble and Bake: Pour the lemon filling evenly over the warm, baked crust. Now, spoon small dollops of the strawberry puree over the lemon filling.
Use a skewer or a butter knife to gently swirl the strawberry puree into the lemon filling. Do not overmix the swirl, you want distinct patterns.
5.
Bake the Bars: Return the pan to the oven. Bake for 25-30 minutes, or until the edges are lightly golden and the center is set. The filling should jiggle only slightly when you gently shake the pan.
Do not overbake, or the filling will become tough.
6. Cool Completely: This is a crucial step for perfect strawberry lemon bars.
Remove the pan from the oven and let it cool completely on a wire rack at room temperature. This can take 2-3 hours. For even cleaner cuts, refrigerate the bars for at least 2 hours (or even overnight) once they are at room temperature.
7. Cut and Serve: Once fully chilled, use the parchment paper overhang to lift the entire slab of bars out of the pan. Place it on a cutting board.
Trim the edges for a neat appearance, if desired. Cut into 16 or 24 squares using a sharp, warm knife (wipe the knife clean between cuts for the best results). Dust with powdered sugar right before serving, if you like. Enjoy your beautiful strawberry lemon bars!
Pro Tips for Success
Achieving perfect strawberry lemon bars every time comes down to a few key techniques. Pay attention to these details for outstanding results.
* Cold Butter is Key for Crust: Always use very cold butter for your shortbread crust. This creates a tender, crumbly texture. If your butter is too warm, the crust will be tough.
Work quickly when cutting in the butter.
* Do Not Overbake the Crust: The crust should be just lightly golden at the edges. Overbaking will make it too hard.
A perfectly baked crust provides the ideal base for your strawberry lemon bars.
* Fresh Lemon Juice and Zest: Do not skimp on fresh lemon! Bottled lemon juice lacks the vibrant flavor and aroma of fresh.
The zest holds most of the lemon’s essential oils, adding incredible depth. Use a microplane for the finest zest.
* Do Not Overmix the Filling: Once you add the eggs, whisk just until combined.
Overmixing incorporates too much air, which can cause the filling to puff up too much and then fall. You want a smooth, dense lemon layer for your strawberry lemon bars.
* Check for Doneness Carefully: The lemon filling for your strawberry lemon bars is done when the edges are set and lightly golden, but the center still has a slight jiggle.
It will continue to set as it cools. Overbaking leads to a rubbery texture.
* Cool Completely (and Chill!): Patience is a virtue here.
Allowing the bars to cool completely at room temperature, then chilling them in the refrigerator, is absolutely essential. This ensures the filling fully sets, preventing a gooey mess when cutting. Cold bars cut beautifully into clean squares.
* Use a Warm Knife for Cutting: For perfectly clean cuts on your strawberry lemon bars, dip a sharp knife in hot water, wipe it dry, and then make your cuts. Repeat for each cut. This prevents sticking and dragging through the filling.
Mastering the small details, like using cold butter for the crust or preventing overbaking, ensures your strawberry lemon bars turn out perfectly every time. Just as these techniques elevate a simple bar, the right accompaniments can transform other delightful treats, so consider our guide to Popular Topping for Mini Pancake: Sweet and Savory Ideas.
Storage & Reheating Tips
Proper storage ensures your delicious strawberry lemon bars stay fresh and tasty.
* Room Temperature: If you plan to serve the bars within a few hours, they can sit at room temperature for up to 2 hours. However, due to the dairy and eggs, refrigeration is generally recommended for longer storage.
* Refrigeration: Store leftover strawberry lemon bars in an airtight container in the refrigerator for up to 4-5 days.
This maintains their freshness and firm texture. Layer parchment paper between layers of bars if stacking them to prevent sticking.
* Freezing: Yes, you can freeze these strawberry lemon bars!
Place cut bars in a single layer on a baking sheet and freeze until solid (about 1-2 hours). Once frozen, transfer them to a freezer-safe airtight container or freezer bag. They will keep well for up to 2-3 months.
Thaw individual bars in the refrigerator overnight or at room temperature for an hour before serving. Freezing is an excellent option for meal prepping treats.
* Reheating: These lemon bars with strawberry are typically served chilled or at room temperature.
Reheating is not usually necessary or recommended, as it can alter the texture of the filling and crust. Just bring them to your desired serving temperature from the fridge.
What to Serve With This Recipe
These delightful strawberry lemon bars are fantastic on their own, but they also pair wonderfully with a variety of accompaniments.
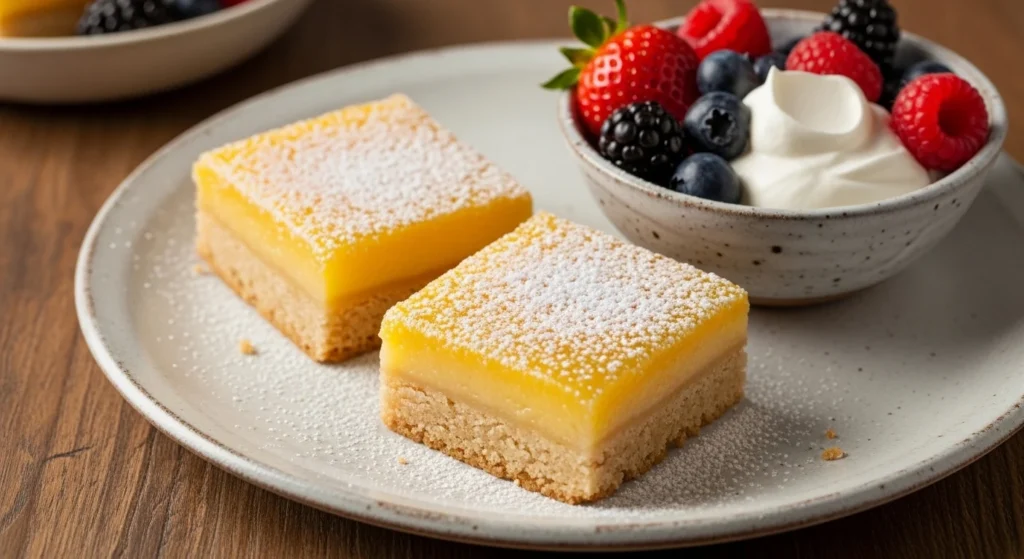
* Fresh Berries: A simple bowl of fresh, mixed berries (strawberries, blueberries, raspberries) makes a beautiful and healthy complement. The extra fruit really highlights the vibrant flavors of the bars.
* Whipped Cream or Ice Cream: For an extra decadent treat, serve your strawberry lemon bars with a dollop of freshly whipped cream or a scoop of vanilla bean ice cream.
The creamy textures contrast beautifully with the tartness of the bars.
* Coffee or Tea: A hot cup of coffee, a refreshing iced tea, or a fragrant herbal tea is the perfect beverage pairing. The acidity of the lemon in the bars often complements a good brew.
* Lemonade or Sparkling Water: Keep the refreshing theme going with a tall glass of homemade lemonade or sparkling water with a slice of lemon. This enhances the bright, citrusy notes of the lemon strawberry bars.
* Yogurt or Greek Yogurt: For a lighter dessert or even a decadent breakfast, serve a small square of a strawberry lemon bar alongside a spoonful of plain Greek yogurt.
The tang of the yogurt works surprisingly well.
* Mimosa or Prosecco: For a more adult gathering, consider pairing these elegant strawberry lemon bars with a light, bubbly mimosa or a glass of chilled Prosecco. The celebratory feel matches the brightness of the dessert.
While these lemon bars are delicious on their own, their wonderful pairing possibilities with fresh berries or creamy toppings make them even more special. If you enjoy creating delightful, bite-sized treats that can be easily customized and served with various additions, you’ll love learning How to Make Mini Pancakes? The Perfect Bite-Sized Comfort Food!
FAQs
How do I know if my strawberry lemon bars are baked through?
Your strawberry lemon bars are done when the edges appear set and lightly golden. The center of the lemon filling should still have a slight jiggle when you gently shake the pan. It will continue to firm up as it cools. An overly firm center means you have likely overbaked them.
Can I make these strawberry lemon bars ahead of time?
Absolutely! These strawberry lemon bars are perfect for making ahead. In fact, they taste even better after a day in the refrigerator, as the flavors meld and the filling fully sets.
Prepare them 1-2 days in advance and store them in an airtight container in the fridge. This makes your entertaining much easier.
Why did my lemon filling crack?
Cracking in your strawberry lemon bars usually happens if the filling was overbaked or cooled too quickly. Overbaking dries out the filling, making it more prone to cracking. Rapid cooling (like putting a hot pan directly into the fridge) can also cause cracks due to sudden temperature changes. Always let them cool slowly at room temperature first.
Can I use frozen strawberries for the swirl?
Yes, you can use frozen strawberries for the swirl in these strawberry lemon bars. Thaw them completely first, then drain any excess liquid. Proceed with the recipe as directed. Keep in mind, frozen strawberries may release more water, so mashing them into a slightly thicker puree might be beneficial.
What if my shortbread crust is too crumbly or too soft?
If your shortbread crust for the strawberry lemon bars is too crumbly to press, you might need a tiny bit more butter (add 1 teaspoon at a time) or slightly warmer butter. If it’s too soft or greasy, your butter might have been too warm or you overmixed it. Ensure your butter is cold and you work quickly. A slightly over-mixed crust might result in a tougher texture, while a very crumbly one will not hold its shape.
Strawberry lemon bars are a popular type of baked dessert, celebrated for their vibrant flavor profile that combines the zesty tang of fresh lemon with the sweet, fruity notes of ripe strawberries. Typically featuring a buttery shortbread crust topped with a creamy, fruit-infused curd, these baked treats offer a delightful balance of sweetness and acidity.
Nutrition Information (per serving)
Here’s an estimated nutritional breakdown for one serving of these delightful strawberry lemon bars, assuming 16 servings per 9×13-inch pan. These values are approximate and can vary based on specific ingredients and brands.
| Nutrient | Amount |
| :—————— | :———- |
| Calories | 320 kcal |
| Total Fat | 16 g |
| Saturated Fat | 10 g |
| Cholesterol | 70 mg |
| Sodium | 75 mg |
| Total Carbohydrates | 42 g |
| Dietary Fiber | 1 g |
| Total Sugars | 28 g |
| Protein | 4 g |
| Vitamin C | 15 mg (17% DV) |
| Iron | 1.5 mg (8% DV) |

strawberry lemon bars
Ingredients
Method
- Preheat your oven to 350°F (175°C). Line a 9x13-inch baking pan with parchment paper, leaving an overhang on the sides for easy removal. In a medium bowl, whisk together the flour, 1/2 cup sugar, and salt. Add the cold, cubed butter. Using a pastry blender or your fingertips, cut the butter into the flour mixture until it resembles coarse crumbs. Press this mixture evenly into the bottom of the prepared pan. Bake for 18-20 minutes, or until the edges are lightly golden. Remove from the oven and set aside. Keep the oven on.
- While the crust bakes, prepare the strawberry swirl. In a small bowl, combine the finely diced strawberries, 1 tablespoon sugar (if using), and 1 teaspoon lemon juice. Mash them gently with a fork or pulse briefly in a food processor until it forms a chunky puree. You want some texture.
- In a large bowl, whisk together the 2 cups granulated sugar and 1/4 cup flour. This helps prevent the sugar from clumping and creates a smooth filling. Add the eggs, lemon zest, and lemon juice. Whisk until the mixture is completely smooth and well combined. Do not overmix; just combine thoroughly.
- Pour the lemon filling evenly over the warm, baked crust. Now, spoon small dollops of the strawberry puree over the lemon filling. Use a skewer or a butter knife to gently swirl the strawberry puree into the lemon filling. Do not overmix the swirl, you want distinct patterns.
- Return the pan to the oven. Bake for 25-30 minutes, or until the edges are lightly golden and the center is set. The filling should jiggle only slightly when you gently shake the pan. Do not overbake, or the filling will become tough.
- This is a crucial step for perfect strawberry lemon bars. Remove the pan from the oven and let it cool completely on a wire rack at room temperature. This can take 2-3 hours. For even cleaner cuts, refrigerate the bars for at least 2 hours (or even overnight) once they are at room temperature.
- Once fully chilled, use the parchment paper overhang to lift the entire slab of bars out of the pan. Place it on a cutting board. Trim the edges for a neat appearance, if desired. Cut into 16 or 24 squares using a sharp, warm knife (wipe the knife clean between cuts for the best results). Dust with powdered sugar right before serving, if you like. Enjoy your beautiful strawberry lemon bars!