
Oh, summer evenings! I can practically smell the charcoal and hear the crickets chirping as I think about them. For me, a mom of three, those moments are pure gold.
But let’s be real, often by the time dinner rolls around, I’m utterly exhausted. That’s why I truly cherish simple recipes that taste amazing but don’t add to the evening rush. One dish that perfectly encapsulates this philosophy is my famous Grilled Corn on the Cob (Meal Prep) recipe.
I remember one particularly hectic Tuesday, school activities, grocery run, and then suddenly, dinner time was looming. My oldest, Leo, with his big eyes, asked, “Mom, can we have that yummy grilled corn?” My heart sank a little, thinking of the extra time. But then I remembered!
I had prepped a big batch of Grilled Corn on the Cob (Meal Prep) over the weekend. A quick reheat, and suddenly, our Tuesday dinner felt like a relaxed Sunday barbecue. This recipe isn’t just about grilling corn; it’s about reclaiming those precious moments, making sure delicious, nourishing food is always within reach, even on the busiest days.
It’s about bringing that summer cookout joy to any meal, any day of the week, effortlessly. If you’re looking to simplify your weeknights without sacrificing flavor, then mastering Grilled Corn on the Cob (Meal Prep) is an absolute game-changer. Let’s make some memories and some delicious corn!
Why You’ll Love This Grilled Corn on the Cob (Meal Prep) Recipe
This Grilled Corn on the Cob (Meal Prep) recipe is a true lifesaver for busy families. First, it brings that incredible smoky, sweet flavor of freshly grilled corn straight to your table. Imagine the sweet kernels bursting with flavor!
Next, it completely cuts down on weeknight cooking stress. You prepare a larger batch once, then enjoy the fruits of your labor for days. This Grilled Corn on the Cob (Meal Prep) strategy means less time in the kitchen and more time making memories.
Furthermore, it’s incredibly versatile. Grilled corn pairs beautifully with almost any meal, from a simple grilled chicken to a hearty BBQ spread. Also, it’s a wholesome, naturally sweet vegetable, perfect for nourishing your family.
It’s packed with fiber and vitamins, making it a healthy addition to any plate. Finally, this Grilled Corn on the Cob (Meal Prep) recipe is budget-friendly, especially when corn is in season. You get maximum flavor and convenience without breaking the bank. It truly simplifies your meal planning.
Ingredients You’ll Need
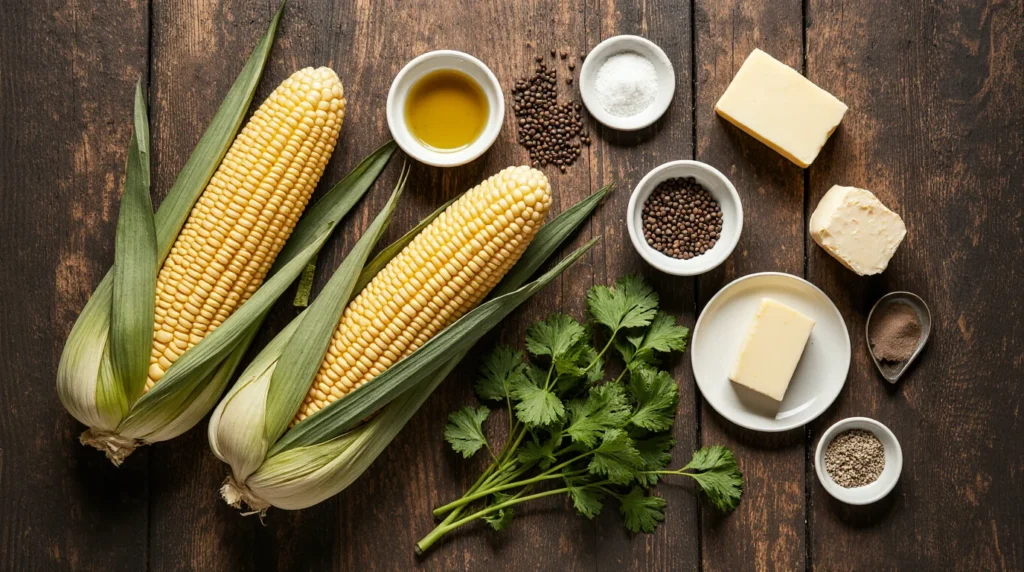
Gathering your ingredients is the first step to delicious Grilled Corn on the Cob (Meal Prep). You really only need a few simple things. Fresh corn is key for the best flavor.
Olive oil helps achieve that beautiful char and prevents sticking. Salt and pepper are essential seasonings.
| Ingredient | Quantity |
|---|---|
| Fresh Corn on the Cob | 8-12 ears (or as many as your grill can hold) |
| Olive Oil | 2-3 tablespoons |
| Sea Salt | To taste |
| Freshly Ground Black Pepper | To taste |
| Optional: Butter (for serving) | As desired |
| Optional: Fresh Herbs (for garnish) | Chopped cilantro or parsley |
Substitutions & Variations
This Grilled Corn on the Cob (Meal Prep) recipe is incredibly adaptable. Feel free to get creative with your seasonings!
* Spice it Up: For a kick, sprinkle on some chili powder, smoked paprika, or a dash of cayenne pepper before grilling. A squeeze of lime juice after grilling also brightens the flavors beautifully. This makes for a zesty Grilled Corn on the Cob (Meal Prep).
* Herbaceous Delight: Mix finely chopped fresh herbs like cilantro, parsley, or chives into a little softened butter or olive oil. Brush this herb mixture onto the corn during the last few minutes of grilling. It infuses a wonderful aroma.
* Garlic Lover’s Dream: Add a teaspoon of garlic powder or finely minced fresh garlic to your olive oil before brushing. This simple addition elevates the savory notes of your Grilled Corn on the Cob (Meal Prep).
* Cheesy Goodness: After grilling, roll the hot corn in a mixture of grated Parmesan cheese and finely chopped parsley.
This is a common and delicious twist on classic grilled corn.
* Sweet & Smoky: A touch of brown sugar or maple syrup in your olive oil rub can create a caramelized, sweet, and smoky crust. This is a delightful variation for your Grilled Corn on the Cob (Meal Prep).
* Oil Alternatives: If you prefer, avocado oil or even melted coconut oil can be used instead of olive oil. They all work well for achieving that perfect char.
* Dairy-Free Option: Simply omit the optional butter for serving. The corn is delicious on its own with just salt and pepper.
While exploring different seasonings for your grilled corn on the cob adds fantastic variety to your meal prep, thinking about complementary main dishes can elevate your spread even further. If you’re looking for another comforting classic that pairs well with simple sides, mastering How to Make Grilled Cheese and Tomato Soup: A Perfect Comfort Food Combo is a fantastic next step.
Step-by-Step Instructions
Preparing this Grilled Corn on the Cob (Meal Prep) is straightforward. Follow these steps for perfect results every time.
1. Prepare the Corn: First, shuck the corn. Remove all the husks and silk strands.
It’s easier to handle when clean. You want clean ears for the best Grilled Corn on the Cob (Meal Prep).
2.
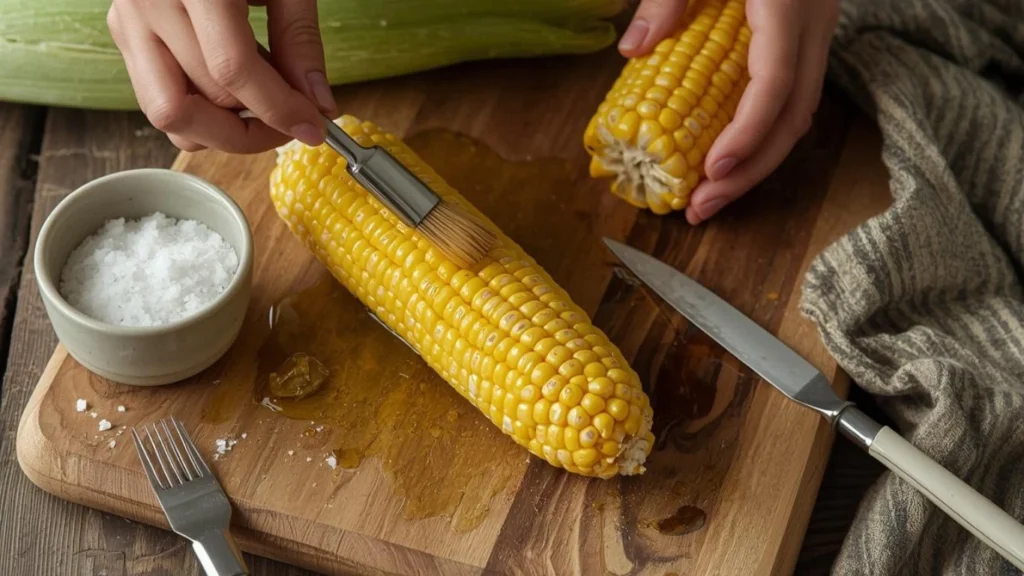
Season the Corn: Next, lightly brush each ear of corn with olive oil. Use a pastry brush or your hands. Ensure an even coating.
Then, season generously with sea salt and black pepper on all sides. This simple seasoning enhances the corn’s natural sweetness. This preparation is crucial for delicious Grilled Corn on the Cob (Meal Prep).
3. Preheat Your Grill: Preheat your grill to medium-high heat. You want it hot enough to get a nice char, but not so hot that it burns the corn too quickly.
A well-preheated grill is essential for successful Grilled Corn on the Cob (Meal Prep).
4. Grill the Corn: Place the seasoned corn directly on the grill grates.
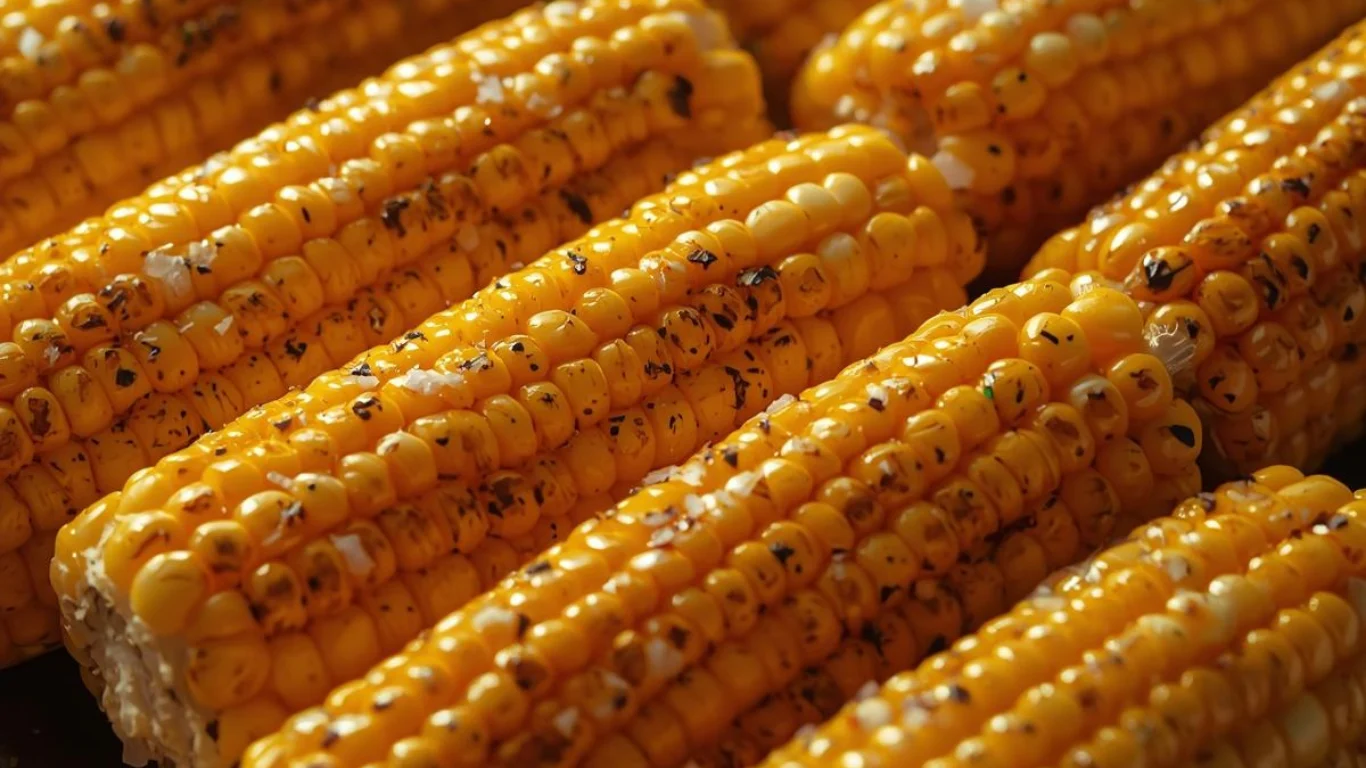
Close the lid if your grill has one. Grill for 10-15 minutes, turning every 2-3 minutes, until the kernels are tender and slightly charred on all sides. Watch for those beautiful grill marks.
The key is even cooking and charring. This step perfects your Grilled Corn on the Cob (Meal Prep).
5.
Cool Completely: Once grilled, remove the corn from the grill. Let it cool completely on a wire rack at room temperature. Do not cover it while cooling, as this can create condensation and make the corn soggy.
This cooling step is vital for proper Grilled Corn on the Cob (Meal Prep) storage.
6. Store for Meal Prep: After the corn is completely cool, you have a few options for storage.
* Whole Ears: Wrap each ear individually in plastic wrap or foil.
* Cut Kernels: For easier storage and future use, carefully cut the kernels off the cob using a sharp knife. Place the corn cob upright in a large bowl, then slice downwards.
Store the kernels in an airtight container.
7. Refrigerate: Place your prepared Grilled Corn on the Cob (Meal Prep) (whole or as kernels) in the refrigerator. It will stay fresh for up to 3-4 days.
Pro Tips for Success
Achieving perfectly delicious Grilled Corn on the Cob (Meal Prep) every time involves a few simple tricks.
* Choose Fresh Corn: Always select the freshest corn possible. Look for husks that are bright green, tightly wrapped, and slightly damp. Feel for firm, plump kernels through the husk.
Avoid any ears with dry husks or visible blemishes. Freshness makes all the difference in your Grilled Corn on the Cob (Meal Prep).
* Don’t Overcrowd the Grill: Give your corn space on the grill.
Overcrowding lowers the grill temperature and can lead to uneven cooking. Grill in batches if necessary. This ensures proper charring for every piece of Grilled Corn on the Cob (Meal Prep).
* Rotate Frequently: Turning the corn every few minutes ensures even cooking and uniform charring. You want golden-brown kernels with some dark spots, but not completely blackened. Constant attention creates the best Grilled Corn on the Cob (Meal Prep).
* The “Shuck and Brush” Method: For meal prep, shucking the corn completely before grilling is often the most efficient method. It allows for direct seasoning and charring. While grilling in the husk can add steam, direct grilling offers a superior smoky flavor for your Grilled Corn on the Cob (Meal Prep).
* Seasoning After Grilling: For an extra flavor boost, try adding more seasonings or a compound butter *after* the corn comes off the grill. The hot corn will absorb those flavors beautifully.
* Cooling is Crucial for Meal Prep: Do not skip the complete cooling step.
Warm food placed directly into a sealed container can create condensation, leading to spoilage and a less appealing texture. Ensure your Grilled Corn on the Cob (Meal Prep) is fully cooled before storage.
* Consider a Grill Basket: If you are grilling many ears of corn, or want to prevent any from rolling off, a grill basket can be a helpful tool. It makes turning easier and more efficient.
Just as selecting fresh corn is key to perfecting this meal prep grilled corn, following clear, detailed instructions ensures success in any culinary endeavor. If you appreciate a great step-by-step guide to help you master new dishes, you’ll find similar clarity in learning How to Make Grilled Cheese and Tomato Soup? Great Step By Step for another satisfying meal.
Storage & Reheating Tips
Proper storage is crucial for maximizing the life of your Grilled Corn on the Cob (Meal Prep). Reheating it correctly ensures great flavor every time.
Storage:
* Refrigerator: Once your Grilled Corn on the Cob (Meal Prep) has completely cooled, store it in an airtight container or wrap individual ears tightly in plastic wrap or aluminum foil. It will last beautifully in the refrigerator for 3-4 days. This makes weeknight meals incredibly easy.
* Freezer (Kernels): If you want to extend its life even further, cut the kernels off the cob. Spread the kernels in a single layer on a baking sheet and freeze for about an hour until firm. Then transfer the frozen kernels to a freezer-safe bag or container.
This prevents clumping. Your frozen Grilled Corn on the Cob (Meal Prep) kernels will last for up to 3 months. When ready to use, simply thaw and reheat. Freezing the kernels is perfect for long-term Grilled Corn on the Cob (Meal Prep).
Reheating:
* Microwave (Quickest): For whole ears, wrap lightly in a damp paper towel and microwave for 1-2 minutes, flipping halfway. For kernels, place in a microwave-safe bowl, cover, and heat for 1-2 minutes, stirring once. This is the fastest way to reheat your Grilled Corn on the Cob (Meal Prep).
* Oven/Toaster Oven (Best for Whole Ears): Preheat your oven to 350°F (175°C). Wrap each ear of corn loosely in foil. Heat for 8-10 minutes, or until warmed through.
This method helps retain moisture and char. It makes your Grilled Corn on the Cob (Meal Prep) taste fresh again.
* Skillet (Best for Kernels): Heat a non-stick skillet over medium heat with a tiny bit of butter or olive oil.
Add the kernels and sauté for 3-5 minutes, stirring frequently, until heated through. This method also works well for reheating your Grilled Corn on the Cob (Meal Prep).
* Air Fryer (Crispy Kernels): For a slightly crispier texture, place kernels in a single layer in your air fryer basket.
Cook at 350°F (175°C) for 3-5 minutes, shaking halfway, until hot and slightly crisped. This is a great way to warm up your Grilled Corn on the Cob (Meal Prep).
What to Serve With This Recipe
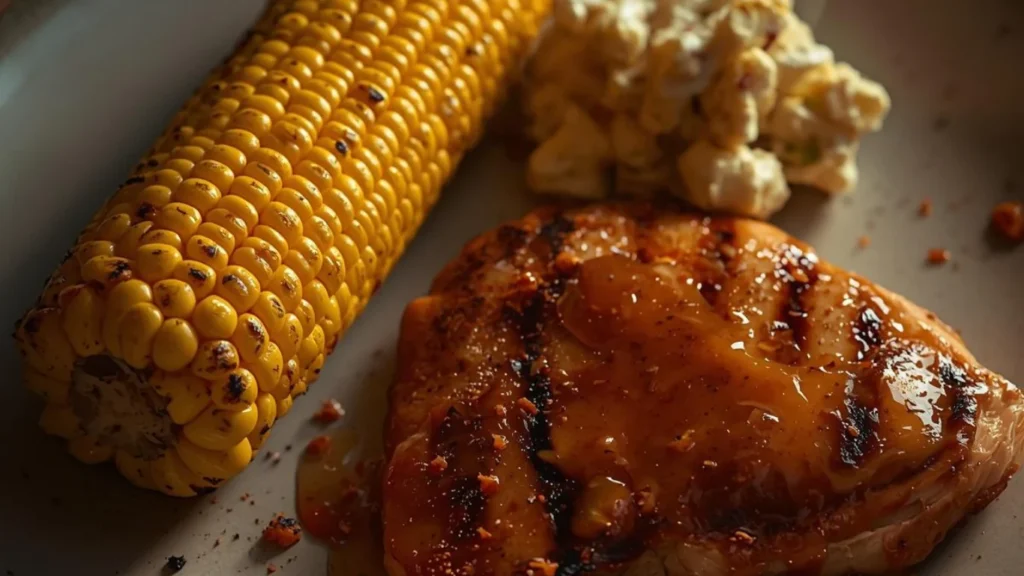
This Grilled Corn on the Cob (Meal Prep) is incredibly versatile and pairs well with so many dishes! It’s the quintessential summer side, but you can enjoy it year-round.
* Classic BBQ Mains: Serve it alongside grilled chicken, juicy burgers, tender ribs, or pulled pork sandwiches. The smoky sweetness of the corn complements these flavors perfectly. Your Grilled Corn on the Cob (Meal Prep) really shines here.
* Seafood: It’s a fantastic accompaniment to grilled salmon, shrimp skewers, or even fish tacos. The light, fresh taste of seafood marries beautifully with the sweetness of the corn.
* Salads: Cut the kernels off the cob and add them to a vibrant summer salad.
It provides a delightful crunch and burst of flavor. This transforms any simple salad into a meal with Grilled Corn on the Cob (Meal Prep).
* Tacos & Burrito Bowls: Grilled corn kernels are an amazing addition to any taco night or homemade burrito bowl.
They add texture, sweetness, and a lovely smoky note. This makes for a flavorful addition from your Grilled Corn on the Cob (Meal Prep).
* Other Summer Sides: Pair it with classic potato salad, coleslaw, or a fresh tomato and cucumber salad for a complete and satisfying meal.
* Simple Weeknight Dinners: Reheat some Grilled Corn on the Cob (Meal Prep) and serve it with a quick pan-seared chicken breast and a side salad for a fast, healthy, and delicious meal.
* Breakfast/Brunch: Believe it or not, grilled corn kernels can be a delightful addition to breakfast burritos or even a breakfast hash. Get creative!
While grilled corn is a wonderfully versatile side, pairing it thoughtfully can enhance any meal, much like considering the nutritional balance of your entire plate. If you’re curious about the health aspects of other beloved comfort foods and how they fit into a balanced diet, you might be interested in a full Guide on Is Grilled Cheese Healthy?
FAQs
How do I choose the freshest corn?
Look for husks that are bright green, tightly wrapped around the cob, and slightly damp. The silk should be light brown or golden and slightly sticky. Avoid any ears with dry husks, a sour smell, or visible wormholes.
Feel the kernels through the husk; they should feel plump and firm, not soft or mushy. Choosing fresh corn ensures the best Grilled Corn on the Cob (Meal Prep).
Can I grill corn without shucking it first?
Yes, you can! Grilling corn in its husk steams the kernels slightly, resulting in a very tender texture. You simply soak the un-shucked ears in water for 15-30 minutes, then place them directly on the grill.
The husks will char, but the kernels inside will be perfectly cooked. However, for Grilled Corn on the Cob (Meal Prep), shucking first allows for direct seasoning and a more pronounced smoky char, which I prefer for flavor and consistency.
What if I don’t have an outdoor grill?
No problem! You can achieve a similar effect using a grill pan on your stovetop or even a broiler in your oven. For a grill pan, heat it to medium-high, brush corn with oil, and cook, turning frequently, until charred.
For broiler, place corn on a baking sheet, brush with oil, and broil for 5-7 minutes, turning, until charred. Both methods create delicious Grilled Corn on the Cob (Meal Prep).
Is grilled corn healthy?
Absolutely! Corn is a whole grain and provides dietary fiber, which aids digestion. It’s also a good source of vitamins C, B, and magnesium.
Grilling is a healthy cooking method, as it requires minimal added fat. When prepared as Grilled Corn on the Cob (Meal Prep), it remains a nutritious and satisfying side dish.
Can I freeze grilled corn on the cob whole?
While you *can* freeze whole grilled corn on the cob, I generally recommend cutting the kernels off before freezing for better storage and versatility. Whole cobs take up more freezer space, and the texture can sometimes become a bit mushy when thawed and reheated. Freezing kernels from your Grilled Corn on the Cob (Meal Prep) allows for easier portioning and integration into other dishes.
How do I prevent the corn from sticking to the grill?
Ensure your grill grates are clean and well-oiled before placing the corn down. Brushing the corn itself with olive oil also creates a barrier and helps prevent sticking. Make sure your grill is hot enough, as cold grates are more prone to sticking. These steps are key for successful Grilled Corn on the Cob (Meal Prep).
Grilling corn on the cob is a popular cooking method that imparts a smoky flavor and tender-crisp texture, often enjoyed at outdoor gatherings. When prepared for meal preparation, it allows for convenient enjoyment of this flavorful side dish throughout the week.
Nutrition Information (per serving)
The nutritional information for Grilled Corn on the Cob (Meal Prep) can vary based on the size of the ear and any additional butter or seasonings used. This estimate is for one medium ear of grilled corn (approximately 100g) seasoned simply with olive oil, salt, and pepper.
| Nutrient | Amount |
|---|---|
| Calories | 100-120 kcal |
| Total Fat | 3-5 g |
| Saturated Fat | 0.5-1 g |
| Cholesterol | 0 mg |
| Sodium | 50-100 mg |
| Total Carbohydrates | 20-25 g |
| Dietary Fiber | 2.5-3 g |
| Total Sugars | 5-7 g |
| Protein | 3-4 g |
| Vitamin C | 10% DV |
| Magnesium | 5% DV |
*Daily Values (DV) are based on a 2,000 calorie diet.
Grilled Corn on the Cob (Meal Prep)
Ingredients
Method
- Prepare the Corn: First, shuck the corn. Remove all the husks and silk strands. It’s easier to handle when clean.
- Season the Corn: Next, lightly brush each ear of corn with olive oil. Use a pastry brush or your hands. Ensure an even coating. Then, season generously with sea salt and black pepper on all sides.
- Preheat Your Grill: Preheat your grill to medium-high heat. You want it hot enough to get a nice char, but not so hot that it burns the corn too quickly.
- Grill the Corn: Place the seasoned corn directly on the grill grates. Close the lid if your grill has one. Grill for 10-15 minutes, turning every 2-3 minutes, until the kernels are tender and slightly charred on all sides. Watch for those beautiful grill marks.
- Cool Completely: Once grilled, remove the corn from the grill. Let it cool completely on a wire rack at room temperature. Do not cover it while cooling, as this can create condensation and make the corn soggy.
- Store for Meal Prep: After the corn is completely cool, you have a few options for storage. Whole Ears: Wrap each ear individually in plastic wrap or foil. Cut Kernels: For easier storage and future use, carefully cut the kernels off the cob using a sharp knife. Place the corn cob upright in a large bowl, then slice downwards. Store the kernels in an airtight container.
- Refrigerate: Place your prepared Grilled Corn on the Cob (Meal Prep) (whole or as kernels) in the refrigerator. It will stay fresh for up to 3-4 days.