
The scent of caramelized pineapple and warm cake immediately transports me back to my grandmother’s kitchen. I can almost hear her humming a tune as she carefully inverted the pan, revealing that gorgeous, golden-brown fruit topping. For me, food has always been a language of love, and this classic pineapple upside down cake speaks volumes.
It’s not just a dessert; it’s a hug on a plate, a slice of pure joy that brings everyone together. I’m Emilia, a mom of three, and I truly believe the simplest recipes often hold the most magic. This timeless pineapple upside down cake certainly fits the bill, delivering incredible flavor with surprisingly little fuss. You will create treasured memories with this truly classic pineapple upside down cake, just like I do.
Why You’ll Love This Classic Pineapple Upside Down Cake Recipe
This classic pineapple upside down cake is a beloved staple for many reasons. First, it is absolutely stunning. The caramelized pineapple rings and bright red cherries create a beautiful, edible mosaic.
Moreover, this recipe is surprisingly easy to make. Do not let its elegant appearance fool you. Even a beginner baker can achieve success with this straightforward method.
The flavors are simply divine. Sweet, tangy pineapple complements the rich, buttery cake perfectly. Furthermore, it evokes a sense of nostalgia for so many.
This classic pineapple upside down cake reminds people of childhoods and family gatherings. You will surely impress your family and friends when you serve your own classic pineapple upside down cake. It truly is a showstopper without requiring hours in the kitchen.
This classic dessert is comforting, vibrant, and always a crowd-pleaser. You simply cannot go wrong with this classic pineapple upside down cake recipe.
Ingredients You’ll Need
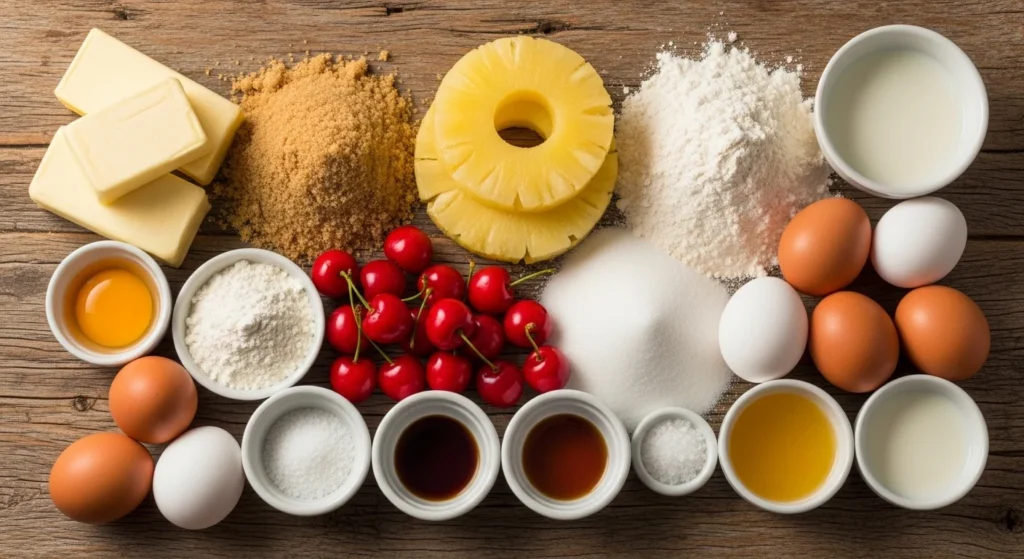
Creating a perfect classic pineapple upside down cake starts with quality ingredients. Gather everything before you begin. This makes the baking process smooth and enjoyable.
We build the cake from the bottom up in the pan, starting with that delicious caramelized topping. The topping includes butter, brown sugar, and of course, the star — pineapple. The cake batter itself uses pantry staples you likely already have on hand.
Always use fresh ingredients for the best flavor. Now, prepare to make a fantastic classic pineapple upside down cake.
| Ingredient | Quantity |
|---|---|
| For the Topping: | |
| Unsalted Butter | ½ cup (1 stick), melted |
| Light Brown Sugar, packed | ¾ cup |
| Canned Pineapple Rings, in juice (not syrup), drained | 1 (20-ounce) can (reserve 2 tbsp juice) |
| Maraschino Cherries, stems removed and drained | 8-10, halved |
| For the Cake: | |
| All-Purpose Flour | 1 ½ cups |
| Granulated Sugar | 1 cup |
| Baking Powder | 2 teaspoons |
| Salt | ¼ teaspoon |
| Unsalted Butter, softened | ½ cup (1 stick) |
| Large Eggs | 2 |
| Vanilla Extract | 1 teaspoon |
| Whole Milk | ½ cup |
| Reserved Pineapple Juice | 2 tablespoons |
Substitutions & Variations
This classic pineapple upside down cake recipe offers a wonderful foundation. You can easily adapt it to suit your preferences or what you have on hand. Do not hesitate to get creative in the kitchen!
* Fruit Variations: While pineapple is traditional, you can certainly experiment. Try sliced peaches, apples, or even a mix of berries. Just arrange them in a single layer at the bottom of the pan.
Ensure they are not too watery, as this can affect the cake’s texture.
* Spice It Up: Add a pinch of cinnamon or nutmeg to the brown sugar mixture. This gives the topping an extra layer of warmth and flavor.
A touch of cardamom also pairs beautifully with pineapple.
* Cake Flavor: Feel free to use a different extract. Almond extract offers a lovely, subtle nuttiness.
Coconut extract enhances the tropical notes of the pineapple.
* Dairy Alternatives: For a dairy-free version, use plant-based butter and milk. Ensure the milk is unsweetened.
The results will still be delicious.
* Whole Wheat Flour: You can substitute up to half of the all-purpose flour with whole wheat pastry flour. This adds a touch of whole grain goodness.
The cake will be slightly denser, but still wonderful.
* Nut Topping: Sprinkle some chopped pecans or walnuts over the brown sugar mixture. This adds a delightful crunch and nutty flavor.
It creates an even richer classic pineapple upside down cake.
* Gluten-Free Option: Use a 1:1 gluten-free all-purpose flour blend. Check for a blend containing xanthan gum for the best texture. This allows everyone to enjoy this classic pineapple upside down cake.
Embracing creativity in the kitchen is key, whether you’re experimenting with fruit in this cake or putting a unique spin on other dishes. For another inventive recipe that twists a classic into a fun, new form, try these delightful Taco Cupcakes: The Fun, Tasty Twist on a Classic Favorite.
Step-by-Step Instructions
Let’s bake this beautiful classic pineapple upside down cake! Follow these steps carefully for the best results. Baking should be a joyful experience, not a stressful one.
1. Prepare Your Pan: Preheat your oven to 350°F (175°C). Use a 9-inch round cake pan.
If you have a cast iron skillet, it works wonders for this cake. Melt ½ cup of unsalted butter directly in the pan over low heat on the stove, or melt it in the microwave and pour it into the pan. Tilt the pan to coat the bottom evenly.
2. Create the Topping: Sprinkle the ¾ cup of light brown sugar evenly over the melted butter in the pan. Now, arrange the drained pineapple rings over the brown sugar.
Get creative with your pattern! Place a halved maraschino cherry in the center of each pineapple ring and scatter the remaining cherry halves in the gaps. This forms the beautiful top of your classic pineapple upside down cake.
3. Whisk Dry Ingredients: In a medium bowl, whisk together the all-purpose flour, granulated sugar, baking powder, and salt. Make sure there are no lumps.
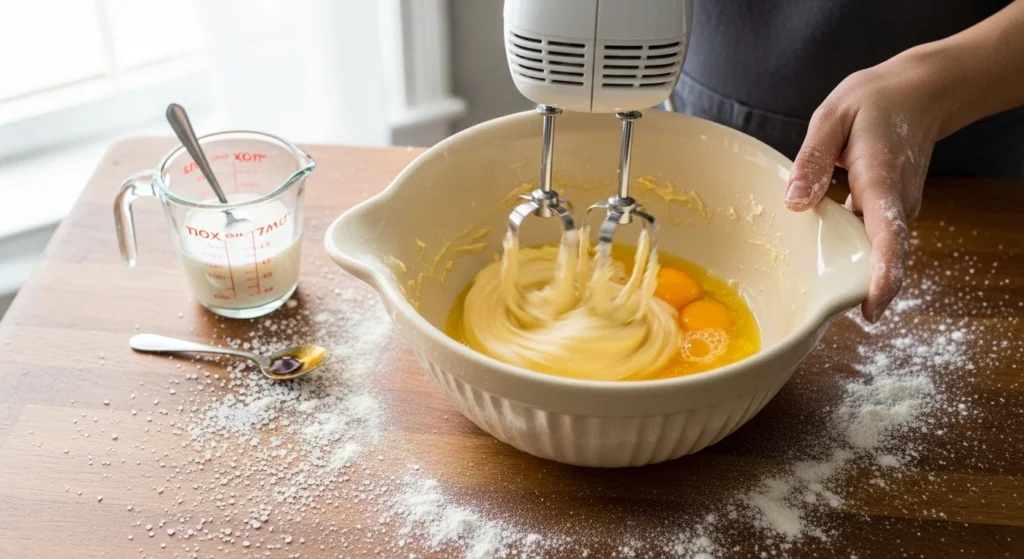
4. Cream Butter and Eggs: In a large mixing bowl, beat the softened ½ cup butter with a hand mixer or stand mixer until creamy. Add the eggs one at a time, beating well after each addition.
Stir in the vanilla extract. The mixture will become light and fluffy.
5.
Combine Wet and Dry: Gradually add the dry ingredients to the wet ingredients, alternating with the milk and reserved pineapple juice. Begin and end with the dry ingredients. Mix on low speed just until combined.
Be careful not to overmix the batter. Overmixing develops the gluten too much, resulting in a tough cake.
6.
Pour Batter: Carefully spoon the cake batter over the pineapple and cherry topping in the prepared pan. Gently spread it evenly with an offset spatula or the back of a spoon. Make sure not to disturb the fruit layer too much.
7. Bake: Place the cake pan in the preheated oven. Bake for 35-45 minutes, or until a wooden skewer or toothpick inserted into the center of the cake comes out clean.
The cake should be golden brown and spring back when lightly touched.
8. Cool and Invert: Remove the cake from the oven.
Let it cool in the pan on a wire rack for *only 10-15 minutes*. This timing is crucial. The caramel needs to set slightly but remain fluid enough to release easily.
9. The Big Reveal: Place a large serving plate or platter upside down over the cake pan. Hold both the pan and the plate firmly together.
Invert the cake in one swift motion. The pan will now be on top. Carefully lift the cake pan.
If any fruit sticks, gently scrape it off with a spoon and place it back onto the cake. Admire your perfectly crafted classic pineapple upside down cake!
10.
Serve: Allow the cake to cool completely on the platter before slicing and serving. This ensures the caramel sets fully and the cake is easy to cut.
Pro Tips for Success
Achieving that perfect, show-stopping classic pineapple upside down cake requires a few clever tricks. These tips will help you avoid common pitfalls and ensure your cake is nothing short of amazing.
* Use the Right Pan: A 9-inch round cake pan is standard. However, a cast iron skillet works beautifully. It conducts heat evenly and helps create that rich, deeply caramelized topping.
If using a regular cake pan, make sure it is not too thin.
* Drain Pineapple Thoroughly: Excess moisture from the pineapple can make your cake soggy. Pat the pineapple rings dry with paper towels after draining.
Reserve a couple of tablespoons of juice for the cake batter; this adds wonderful flavor.
* Don’t Overmix the Batter: Mix the cake batter just until the ingredients are combined. Overmixing develops gluten, which can lead to a tough, dry cake.
A light hand creates a tender crumb.
* The Inversion Timing is Key: Waiting too long to invert the cake allows the caramel to cool and harden, making it stick to the pan. Inverting it too soon can cause the cake to fall apart.
The sweet spot is 10-15 minutes after it comes out of the oven. Set a timer!
* Grease the Pan for Extra Insurance: Even with the butter in the topping, some people like to lightly grease the sides of the pan.
This provides extra assurance that the cake will release easily.
* Customize Your Fruit Arrangement: Take time to arrange the pineapple rings and cherries. This is the part everyone sees first!
A beautiful pattern makes a stunning presentation.
* Room Temperature Ingredients: Ensure your butter and eggs are at room temperature. This helps them cream together smoothly and incorporate evenly into the batter. This creates a more uniform and tender cake.
Just as specific techniques ensure your pineapple upside down cake turns out perfectly, mastering a recipe’s nuances guarantees delicious results every time. If you’re looking for another recipe where clever preparation leads to a delightful outcome, consider our Taco Cupcakes Recipe: A Fun & Delicious Twist on Classic Tacos.
Storage & Reheating Tips
You can easily store and enjoy your classic pineapple upside down cake for several days. Proper storage maintains its freshness and delicious flavor.
* Storing at Room Temperature: Store the cooled classic pineapple upside down cake loosely covered with plastic wrap or in an airtight container at room temperature for up to 2 days. The caramelized topping can become slightly sticky in humid conditions, so an airtight container is ideal.
* Refrigerating: For longer storage, you can refrigerate the cake.
Wrap it tightly in plastic wrap or place it in an airtight container. It will keep well in the refrigerator for up to 4-5 days. The cake may become a little denser when cold.
* Freezing: This cake freezes surprisingly well! Once completely cooled, wrap individual slices or the whole cake tightly in plastic wrap, then in aluminum foil. Place it in a freezer-safe bag or container.
Freeze for up to 2-3 months.
* Reheating (Optional): If serving from the refrigerator or freezer, you might want to warm it slightly. For refrigerated cake, warm individual slices in the microwave for 15-30 seconds.
For frozen cake, thaw it overnight in the refrigerator. Then, you can warm it gently in the microwave or a low oven (300°F/150°C) for about 10-15 minutes, until just warm through. This brings out the lovely warmth of the pineapple upside down cake.
* Serving Warm: A slightly warm slice of this classic pineapple upside down cake is truly delightful. The warm caramel becomes gooey again, and the cake softens beautifully.
What to Serve With This Recipe
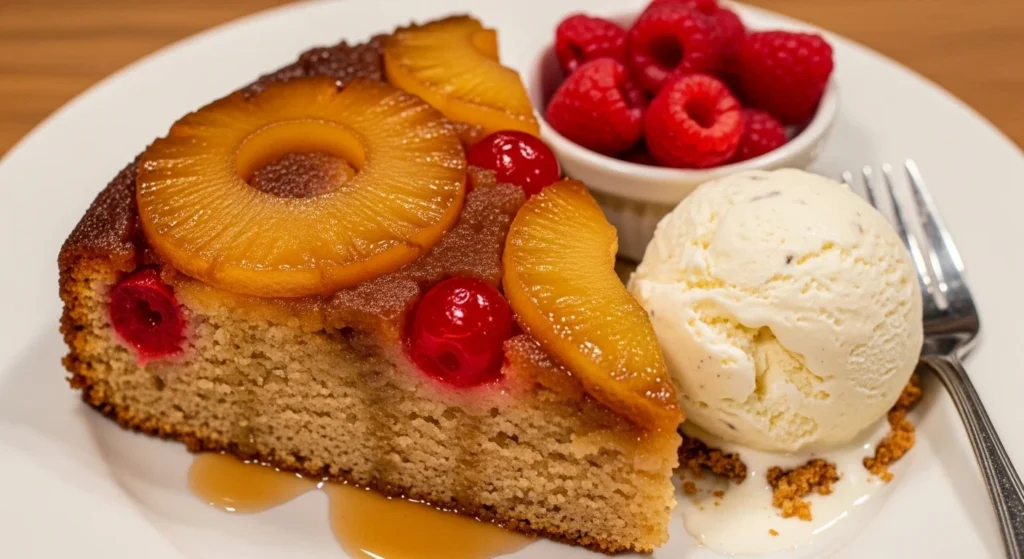
The classic pineapple upside down cake stands perfectly on its own. However, a few simple additions can elevate the experience even further. Think about enhancing its warmth, sweetness, or texture.
* A Scoop of Vanilla Ice Cream: This is the most classic pairing for a reason. The cold, creamy vanilla ice cream melts slightly into the warm cake and its sweet, tangy topping. It creates a delightful contrast.
* Whipped Cream: A dollop of freshly whipped cream adds a light, airy touch. It cuts through the richness of the cake. You can sweeten it slightly with a touch of vanilla extract.
* Crème Fraîche: For a more sophisticated twist, serve with a spoonful of crème fraîche. Its subtle tanginess balances the sweetness of the pineapple and caramel.
* Coconut Flakes: To lean into the tropical vibes, sprinkle some toasted coconut flakes over individual slices.
This adds texture and a complementary flavor.
* Custard Sauce: A warm, silky vanilla custard sauce makes this a truly indulgent dessert. Drizzle it generously over a slice.
* A Light Fruit Compote: While the cake has fruit, a small side of berry compote (strawberries, raspberries) offers a different tartness and color.
* Coffee or Tea: Pair a slice of this delicious classic pineapple upside down cake with a hot cup of coffee, espresso, or your favorite herbal tea. It makes for a perfect afternoon treat.
While some classic dishes are superb on their own, thoughtful additions can truly elevate their appeal, much like pairing this cake with ice cream. For another beloved classic that brings ultimate comfort and can be customized to perfection, delve into our Barilla Lasagna Recipe: A Classic Italian Delight.
FAQs
How do you get the cake out of the pan?
The key is timely inversion! After removing the classic pineapple upside down cake from the oven, let it cool in the pan on a wire rack for 10-15 minutes. This allows the caramel to firm up slightly but not completely harden.
Then, place a large serving plate over the pan, hold them firmly together, and flip them over quickly. Lift the pan carefully. If any fruit sticks, gently re-position it.
Can I use fresh pineapple instead of canned?
Yes, you certainly can! Peel and core a fresh pineapple. Slice it into ½-inch thick rings.
You might need to blanch the fresh pineapple slices briefly in boiling water (about 1 minute) to soften them slightly. This ensures they cook thoroughly and become tender alongside the cake. Remember to pat them very dry before arranging them. Fresh pineapple delivers a vibrant flavor to your pineapple upside down cake.
How do I know when my pineapple upside down cake is done?
Insert a wooden skewer or toothpick into the center of the cake. It should come out clean, with no wet batter attached. The top of the cake will look golden brown, and it will spring back lightly when you touch it. The edges of the cake will also start to pull away slightly from the sides of the pan.
Can I make this classic pineapple upside down cake ahead of time?
Absolutely! You can bake the cake a day in advance. Store it covered at room temperature.
This allows the flavors to meld beautifully. You can also prepare the topping ingredients and even the dry cake ingredients ahead of time. This simplifies the final assembly process for your classic pineapple upside down cake.
What if I don’t have a cast iron skillet?
No problem at all! A standard 9-inch round cake pan works perfectly well. Simply melt the butter and brown sugar mixture in a separate small saucepan.
Then, pour it into the bottom of your regular cake pan. Arrange the fruit, then pour the batter over it. The result will still be a fantastic pineapple upside down cake.
The culinary tradition of preparing inverted cakes, where fruit is placed at the bottom of the pan before the batter, has roots stretching back centuries. This method not only creates a beautifully caramelized topping but also keeps the fruit moist and flavorful. The pineapple upside down cake, as we know it, gained significant popularity in the United States during the 1920s with the widespread availability of canned pineapple, transforming it into an enduring American classic.
Nutrition Information (per serving)
This nutrition information is an estimate based on the ingredients listed and assumes 12 servings per cake. Actual values may vary depending on specific brands and exact measurements.
| Nutrient | Amount |
|---|---|
| Calories | 380 kcal |
| Total Fat | 16g |
| Saturated Fat | 10g |
| Cholesterol | 80mg |
| Sodium | 200mg |
| Total Carbohydrates | 56g |
| Dietary Fiber | 1g |
| Total Sugars | 40g |
| Protein | 4g |

classic pineapple upside down cake
Ingredients
Method
- Preheat your oven to 350°F (175°C). Use a 9-inch round cake pan. If you have a cast iron skillet, it works wonders for this cake. Melt ½ cup of unsalted butter directly in the pan over low heat on the stove, or melt it in the microwave and pour it into the pan. Tilt the pan to coat the bottom evenly.
- Sprinkle the ¾ cup of light brown sugar evenly over the melted butter in the pan. Now, arrange the drained pineapple rings over the brown sugar. Get creative with your pattern! Place a halved maraschino cherry in the center of each pineapple ring and scatter the remaining cherry halves in the gaps. This forms the beautiful top of your classic pineapple upside down cake.
- In a medium bowl, whisk together the all-purpose flour, granulated sugar, baking powder, and salt. Make sure there are no lumps.
- In a large mixing bowl, beat the softened ½ cup butter with a hand mixer or stand mixer until creamy. Add the eggs one at a time, beating well after each addition. Stir in the vanilla extract. The mixture will become light and fluffy.
- Gradually add the dry ingredients to the wet ingredients, alternating with the milk and reserved pineapple juice. Begin and end with the dry ingredients. Mix on low speed just until combined. Be careful not to overmix the batter. Overmixing develops the gluten too much, resulting in a tough cake.
- Carefully spoon the cake batter over the pineapple and cherry topping in the prepared pan. Gently spread it evenly with an offset spatula or the back of a spoon. Make sure not to disturb the fruit layer too much.
- Place the cake pan in the preheated oven. Bake for 35-45 minutes, or until a wooden skewer or toothpick inserted into the center of the cake comes out clean. The cake should be golden brown and spring back when lightly touched.
- Remove the cake from the oven. Let it cool in the pan on a wire rack for *only 10-15 minutes*. This timing is crucial. The caramel needs to set slightly but remain fluid enough to release easily.
- Place a large serving plate or platter upside down over the cake pan. Hold both the pan and the plate firmly together. Invert the cake in one swift motion. The pan will now be on top. Carefully lift the cake pan. If any fruit sticks, gently scrape it off with a spoon and place it back onto the cake. Admire your perfectly crafted classic pineapple upside down cake!
- Allow the cake to cool completely on the platter before slicing and serving. This ensures the caramel sets fully and the cake is easy to cut.