
The aroma of baking. For me, Emilia, a mom of three, that scent immediately transports me back to childhood. It’s a sensory hug, a promise of comfort and love.
Nothing embodies this feeling quite like an Old-Fashioned Chocolate Pie. This isn’t just a dessert; it’s a memory, a legacy, a simple act of nourishment for the soul. I remember my grandmother, with flour dusting her apron, effortlessly whisking together ingredients for this very pie.
Her kitchen always hummed with warmth and the sweet scent of chocolate, a signal that something truly special was coming to the table. We’d gather around, little fingers impatiently waiting for the first slice, the rich, creamy filling glistening under a dollop of whipped cream. Those moments taught me that food is undeniably love.
In our bustling household today, finding those pockets of time for homemade goodness feels more important than ever. This classic chocolate pie recipe brings that same simple joy to my family, reminding us all of slower times and the profound comfort found in a truly homemade dessert.
It’s a surprisingly easy recipe, made with basic pantry staples, yet it delivers an unbelievably rich, smooth, and deeply satisfying chocolate experience. Trust me, once you make this comforting Old-Fashioned Chocolate Pie, it will become a cherished tradition in your home too, just as it has in mine.
Why You’ll Love This Old-Fashioned Chocolate Pie Recipe
You’ll absolutely fall in love with this homemade chocolate pie, just like my family has. First, it brings pure nostalgia to your table. This recipe channels the classic flavors and simple beauty of pies from generations past, offering a comforting taste of Americana.
Moreover, it’s incredibly easy to make. Despite its impressive appearance, this old-fashioned chocolate pie requires only a handful of everyday ingredients and straightforward steps. You don’t need fancy equipment or advanced baking skills to achieve perfection.
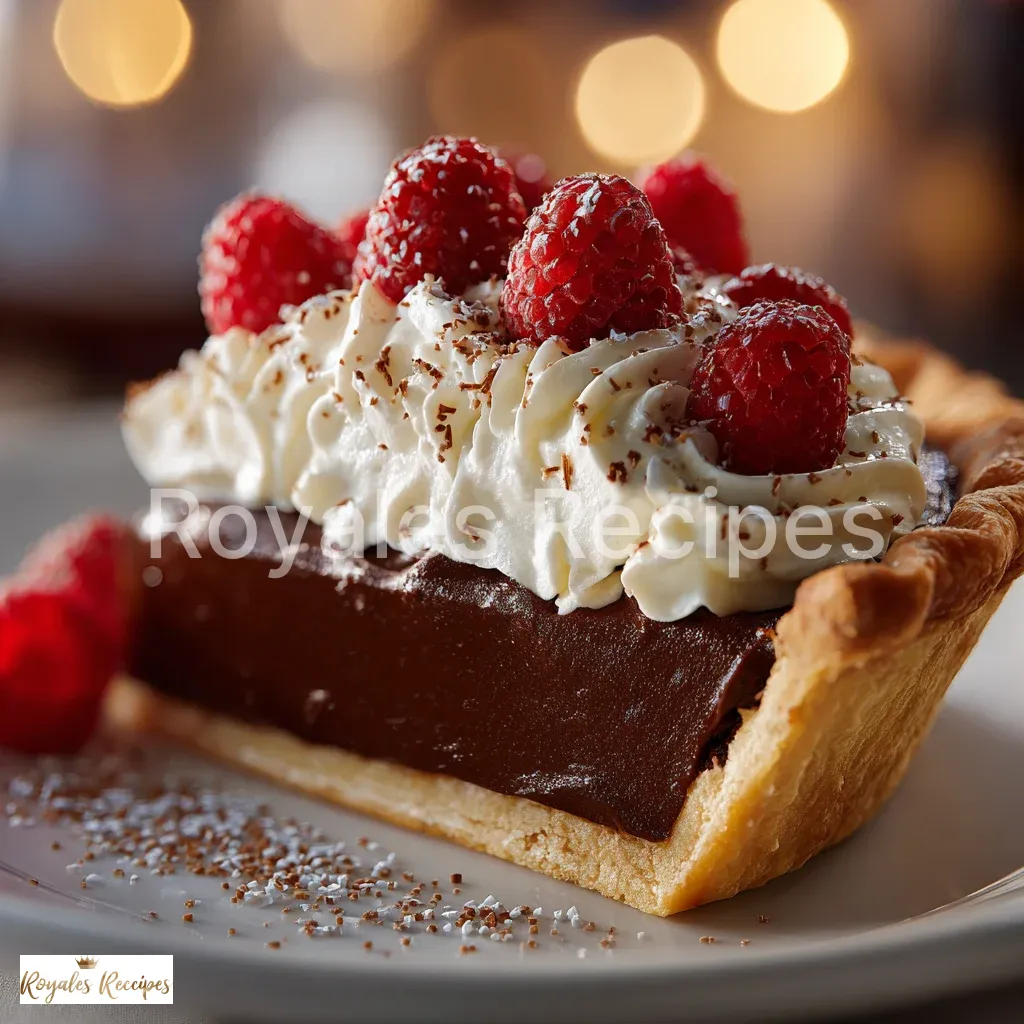
Furthermore, the texture is divine. Imagine a silky-smooth, rich chocolate custard, perfectly set and nestled within a flaky pie crust. Every spoonful melts in your mouth, delivering a deep, satisfying chocolate flavor without being overly sweet.
It’s also incredibly versatile. While perfect on its own, you can easily adapt it with different toppings or crusts to suit your family’s preferences. Finally, this pie is pure comfort food.
It’s the kind of dessert you serve after a hearty family meal, on a cozy Sunday afternoon, or whenever you need a little extra love. This homemade treat proves that simple ingredients, prepared with care, create the most memorable dishes. Make this classic chocolate pie once, and it will quickly become a cherished favorite.
Ingredients You’ll Need
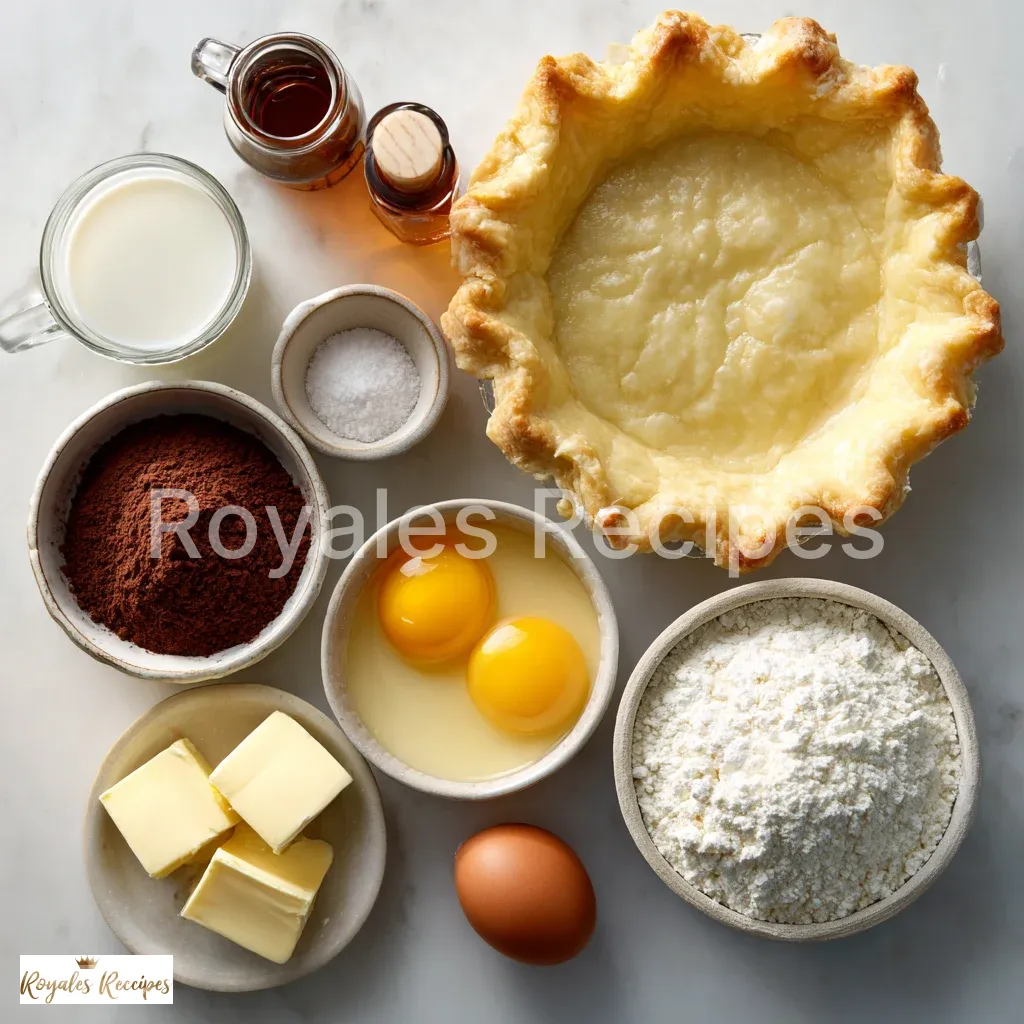
Creating this beautiful Old-Fashioned Chocolate Pie requires simple, wholesome ingredients you likely already have in your pantry. Opt for good quality ingredients; they truly make a difference in the final flavor. Here’s what you’ll gather:
| Category | Ingredient | Quantity | Notes |
|---|---|---|---|
| Crust | Pre-baked 9-inch pie crust | 1 | Store-bought or homemade; ensure it’s fully cooled. |
| Filling | Granulated sugar | 1 cup | Sweetens the chocolate and balances richness. |
| Unsweetened cocoa powder | 1/2 cup | Use high-quality Dutch-processed or natural cocoa for deep flavor. | |
| Cornstarch | 1/4 cup | The thickening agent for a silky-smooth custard. | |
| Salt | 1/2 teaspoon | Enhances all the flavors, don’t skip it! | |
| Whole milk | 2 cups | Creates a rich, creamy base for the filling. | |
| Large egg yolks | 2 | Adds richness and helps with thickening and setting. | |
| Unsalted butter | 2 tablespoons | Adds a luscious mouthfeel and subtle richness. | |
| Flavoring | Vanilla extract | 1 teaspoon | Pure vanilla elevates the chocolate flavor beautifully. |
| Optional Topping | Heavy cream | 1 cup | For homemade whipped cream. |
| Powdered sugar | 1-2 tablespoons | To sweeten whipped cream. |
Substitutions & Variations
This Old-Fashioned Chocolate Pie recipe is wonderfully adaptable, allowing you to tailor it to dietary needs or simply experiment with new flavors. Don’t hesitate to get creative in your kitchen!
Crust Options
While a classic flaky pastry crust is traditional, you have several choices. For a gluten-free version, simply use your favorite store-bought or homemade gluten-free pie crust. Graham cracker crusts also offer a delightful crunch and sweetness that pairs beautifully with chocolate.
Alternatively, a crushed Oreo cookie crust provides an extra layer of chocolatey goodness. Simply follow the package instructions for pre-baking these alternative crusts.
Dairy-Free Modifications
To make this pie dairy-free, you can easily substitute the whole milk. Use a full-fat canned coconut milk (not the beverage kind) for a rich, creamy texture and a subtle tropical hint. Alternatively, a good quality unsweetened almond milk or oat milk works well, though the filling might be slightly less rich. Ensure you also use a dairy-free butter substitute in the filling.
Chocolate Intensity
You control the chocolate intensity. For a milder, sweeter pie, use a natural unsweetened cocoa powder. If you crave a deeper, darker chocolate flavor, opt for Dutch-processed cocoa powder.
You can even stir in a couple of ounces of finely chopped semi-sweet or dark chocolate along with the butter and vanilla at the end of the cooking process. This adds complexity and an even more luxurious texture to your homemade chocolate pie.
Flavor Enhancements
Give your pie an extra dimension of flavor. A pinch of espresso powder (about 1/4 teaspoon) stirred into the dry ingredients significantly deepens the chocolate flavor without making the pie taste like coffee. Similarly, a dash of cinnamon or a tiny pinch of cayenne pepper can add a subtle warmth and sophistication. Consider adding a few drops of peppermint extract for a festive holiday twist, perfect for those who love mint chocolate.
Topping Ideas
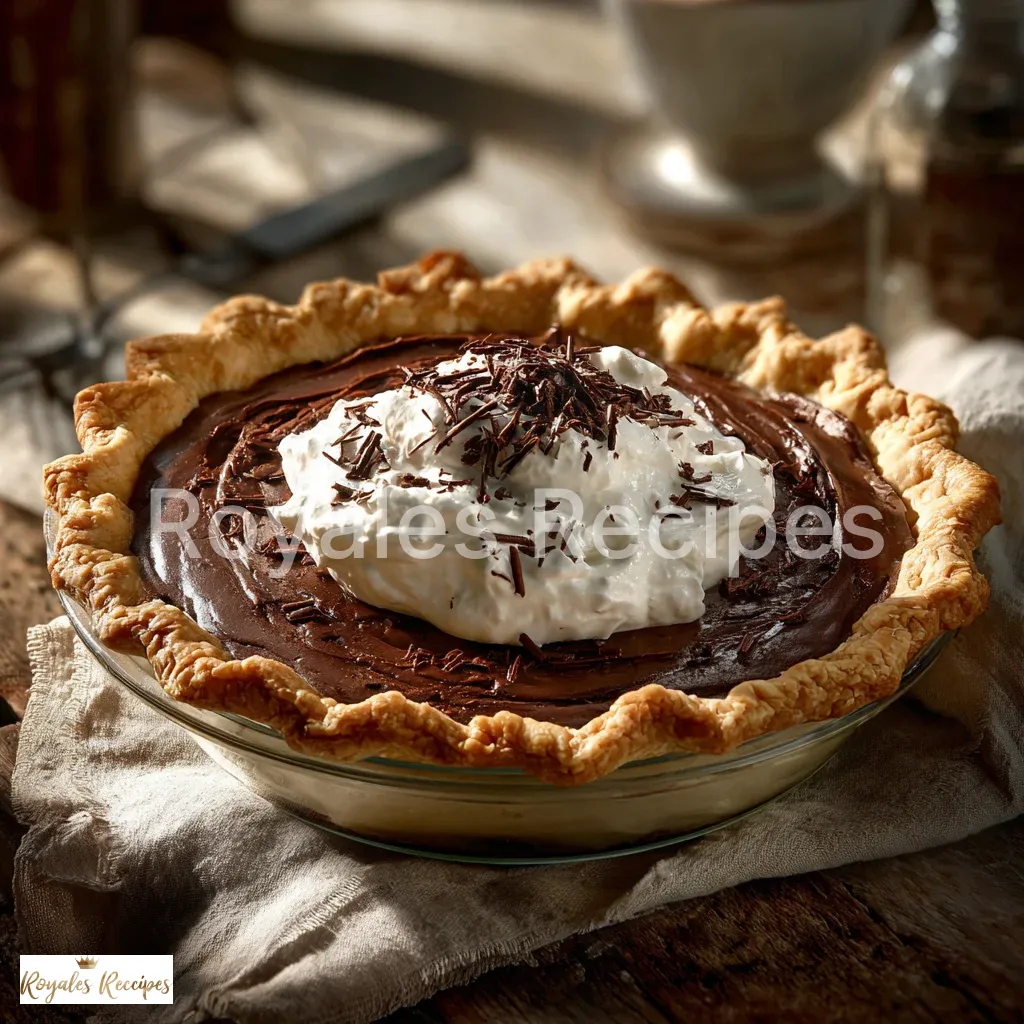
Whipped cream is the classic choice, but don’t stop there. A sprinkle of chocolate shavings, mini chocolate chips, or cocoa powder dusted over the top adds visual appeal. Toasted coconut flakes or chopped toasted pecans also make excellent additions, providing texture and complementary flavors. For a fresh touch, serve slices with a side of fresh raspberries or sliced strawberries.
Step-by-Step Instructions
Creating this delicious Old-Fashioned Chocolate Pie is a straightforward process. Follow these clear steps to achieve a perfectly silky, rich, and deeply satisfying dessert. Always gather all your ingredients before you begin; it makes the cooking process smooth and enjoyable.
Step 1: Prepare the Dry Ingredients
In a medium saucepan, thoroughly whisk together the granulated sugar, unsweetened cocoa powder, cornstarch, and salt. Whisking them dry helps prevent lumps when you add the liquids. Take your time with this step, ensuring everything combines perfectly. This careful preparation sets the stage for a smooth filling.
Step 2: Combine Wet Ingredients
In a separate bowl, whisk together the whole milk and the two large egg yolks until fully blended and uniform in color. This mixture forms the creamy base for your pie filling. Whisk well to ensure the egg yolks disperse completely, contributing to the pie’s smooth texture.
Step 3: Cook the Filling
Pour the milk and egg yolk mixture into the saucepan with the dry ingredients. Place the saucepan over medium heat. Continuously whisk the mixture.
This constant motion prevents scorching and ensures even cooking. Bring the mixture to a gentle boil, letting it bubble for about one minute while still whisking. At this point, the filling will thicken significantly. It should coat the back of a spoon.
Step 4: Finish the Filling
Remove the saucepan from the heat immediately after it thickens. Stir in the two tablespoons of unsalted butter and the one teaspoon of vanilla extract. Stir until the butter completely melts and fully incorporates into the warm chocolate mixture. The vanilla brightens the chocolate flavor, adding a lovely aroma.
Step 5: Fill the Pie Crust
Carefully pour the hot chocolate filling into your pre-baked and cooled 9-inch pie crust. Use a rubber spatula to scrape all the delicious filling from the saucepan. Smooth the top of the filling with the back of the spatula.
Step 6: Chill the Pie
Allow the pie to cool at room temperature for about 30 minutes. Then, cover it loosely with plastic wrap, ensuring the wrap doesn’t touch the surface of the filling (a few toothpicks can help prop it up). Refrigerate the pie for at least 4 hours, or preferably overnight.
Chilling is crucial; it allows the filling to fully set, giving you perfect, clean slices. Don’t rush this step!
Step 7: Serve and Enjoy
Once thoroughly chilled and set, slice your beautiful Old-Fashioned Chocolate Pie. Serve each slice with a generous dollop of homemade whipped cream, if desired. Enjoy the rich, creamy, and comforting flavors!
Pro Tips for Success
Crafting a truly exceptional Old-Fashioned Chocolate Pie involves a few key techniques. These pro tips ensure your pie turns out perfectly smooth, rich, and utterly delicious every single time.
Prevent Lumps for a Silky Smooth Filling
Lumps are the enemy of a perfect pie filling. First, thoroughly whisk all your dry ingredients (sugar, cocoa, cornstarch, salt) together in the saucepan before adding any liquid. This breaks up any cocoa lumps and ensures even distribution.
Next, when adding the milk and egg yolk mixture, whisk continuously and vigorously. Maintain this whisking throughout the cooking process. Continuous stirring prevents the cornstarch from clumping and keeps the egg yolks from scrambling. A silicone whisk is excellent for reaching all corners of the pan and preventing sticking.
Achieve the Perfect Consistency
Cooking time matters for the right consistency. Bring the filling to a gentle boil over medium heat, whisking constantly. Once it begins to bubble, continue cooking and whisking for precisely one minute.
This allows the cornstarch to fully activate and thicken the mixture properly. If you undercook it, your pie will be runny. Overcooking, however, can make it too stiff or gummy. Watch for it to thickly coat the back of a spoon.
Use High-Quality Ingredients
The simplicity of this Old-Fashioned Chocolate Pie means every ingredient shines. Choose a good quality unsweetened cocoa powder; Dutch-processed provides a darker color and milder chocolate flavor, while natural cocoa gives a more intense, slightly fruitier chocolate punch. Use pure vanilla extract, not imitation.
Furthermore, full-fat whole milk delivers the creamiest texture and richest flavor. These small choices significantly impact the final taste.
Don’t Forget the Salt!
Many home bakers might feel tempted to reduce or omit salt in sweet recipes. However, salt plays a crucial role in baking. It balances and enhances the sweetness and deepens the chocolate flavor. A half teaspoon of salt might seem like a lot, but it beautifully rounds out the pie’s overall profile, preventing it from tasting flat or overly sweet.
Cooling is Critical
Patience is key for a perfectly set pie. After pouring the hot filling into the crust, allow it to cool on the counter for about 30 minutes. This initial cooling prevents condensation inside the refrigerator.
Then, cover the pie loosely with plastic wrap. Avoid direct contact with the filling by using toothpicks to tent the plastic. Refrigerate for at least 4 hours, or ideally overnight.
A fully chilled pie ensures clean, beautiful slices and the best possible texture. Rushing this step results in a gooey, unappetizing mess.
Storage & Reheating Tips
This Old-Fashioned Chocolate Pie stores beautifully, making it an excellent make-ahead dessert. Follow these tips to keep your pie fresh and delicious.
Proper Storage
Always store your chocolate pie in the refrigerator. After the initial cooling period (at least 4 hours, preferably overnight), cover the pie loosely with plastic wrap. You can also place it in an airtight pie carrier.
Stored properly, the pie remains fresh for 3 to 4 days. Keep it away from strong-smelling foods in the fridge, as the filling can absorb odors.
Can You Freeze This Pie?
Yes, you can freeze this Old-Fashioned Chocolate Pie, but with a caveat. The texture of the filling can sometimes change slightly after thawing, potentially becoming a bit softer or weepier due to the cornstarch. For best results, freeze the pie *without* any whipped cream topping.
Wrap the fully cooled and set pie tightly in several layers of plastic wrap, then an additional layer of aluminum foil. It will keep in the freezer for up to 1 month. Thaw the pie overnight in the refrigerator before serving. Re-whipping some fresh cream for topping after thawing is highly recommended.
Serving Temperature
This classic chocolate pie is best served chilled, straight from the refrigerator. The cold temperature allows the filling to maintain its firm, silky texture and provides a refreshing contrast to its richness. Avoid serving it at room temperature for extended periods, especially on warm days, as the filling will soften too much.
Reheating? Not Recommended!
Unlike some other pies, you do not reheat this Old-Fashioned Chocolate Pie. Reheating will melt the filling and destroy its perfectly set custard texture. This pie is a cold dessert.
If you enjoy a warmer pie, consider heating a slice briefly in the microwave for a few seconds only, but be aware this alters the texture significantly. Most people prefer it cold and firm.
What to Serve With This Recipe
An Old-Fashioned Chocolate Pie is a star on its own, but pairing it with the right accompaniments elevates the experience, transforming a simple dessert into a memorable occasion. Think about complementing its rich, creamy texture and deep chocolate flavor.
Classic Whipped Cream
Without a doubt, a generous dollop of homemade whipped cream is the ultimate pairing. Its light, airy texture and delicate sweetness perfectly cut through the richness of the chocolate. Make it yourself with heavy cream and a touch of powdered sugar for the best flavor and freshness. This combination is truly unbeatable.
Fresh Berries
Bright, tart berries offer a wonderful contrast to the sweet chocolate. Fresh raspberries, strawberries, or a mix of blueberries and blackberries add a burst of fruity flavor and a pop of color. The acidity of the fruit cleanses the palate, making each bite of pie even more enjoyable.
A Scoop of Ice Cream
For an extra indulgent treat, serve a slice of pie alongside a scoop of vanilla bean ice cream. The cold, creamy ice cream melts slightly into the chocolate pie, creating a heavenly combination. Coffee ice cream also provides a delightful counterpoint, enhancing the chocolate notes.
Coffee or Milk
A hot cup of freshly brewed coffee makes an excellent companion, especially after a meal. The bitterness of the coffee balances the pie’s sweetness. For a simpler, more nostalgic pairing, a tall, cold glass of milk brings out the pie’s comforting, old-fashioned charm, reminiscent of childhood.
Toasted Nuts or Coconut
For added texture and a nutty flavor, sprinkle toasted pecans, walnuts, or shredded coconut over your pie before serving. The slight crunch provides a pleasing contrast to the smooth filling. Ensure you toast them lightly to bring out their full aroma and flavor.
FAQs About Old-Fashioned Chocolate Pie
Can I make this Old-Fashioned Chocolate Pie ahead of time?
Absolutely! This classic chocolate pie is an excellent make-ahead dessert. In fact, it needs at least 4 hours in the refrigerator to properly set, and it tastes even better when chilled overnight.
Prepare it the day before your event, cover it loosely with plastic wrap, and store it in the fridge. This makes entertaining so much easier!
Why did my chocolate pie filling turn out runny?
A runny filling typically indicates that the cornstarch did not fully activate or cook long enough. You must bring the mixture to a gentle boil, letting it bubble for a full minute while continuously whisking. This ensures the cornstarch properly thickens the custard.
Undercooking or insufficient whisking prevents the filling from setting firm. Also, ensure you measure the cornstarch accurately; too little will result in a soft set.
What kind of cocoa powder is best for this recipe?
You can use either natural unsweetened cocoa powder or Dutch-processed cocoa powder for this Old-Fashioned Chocolate Pie. Natural cocoa (like Hershey’s regular) offers a classic, slightly reddish-brown color and a more intense, acidic chocolate flavor. Dutch-processed cocoa provides a darker color, a milder, less acidic taste, and a smoother finish. Both work well, so choose based on your preference for chocolate depth and color.
Can I use whole eggs instead of just egg yolks?
While you can use whole eggs, the recipe specifically calls for egg yolks for a reason. Egg yolks contribute significant richness and emulsifying properties, which help create a silkier, creamier, and more stable custard filling. Using whole eggs can result in a slightly less rich flavor and a texture that might not be quite as smooth or luxurious. If you do use whole eggs, use one whole egg for every two yolks specified, and whisk it thoroughly.
How can I prevent a skin from forming on the pie filling while it cools?
To prevent a skin from forming on your Old-Fashioned Chocolate Pie filling, cover the surface with plastic wrap immediately after pouring it into the pie crust. Press the plastic wrap directly onto the surface of the hot filling, ensuring no air remains between the plastic and the pie. This creates a barrier, preventing a tough skin from forming as it cools. Remove the plastic wrap just before serving.
Old-Fashioned Chocolate Pie
Ingredients
Method
- Prepare the Dry Ingredients: In a medium saucepan, thoroughly whisk together the granulated sugar, unsweetened cocoa powder, cornstarch, and salt. Whisking them dry helps prevent lumps when you add the liquids.
- Combine Wet Ingredients: In a separate bowl, whisk together the whole milk and the two large egg yolks until fully blended and uniform in color. This mixture forms the creamy base for your pie filling.
- Cook the Filling: Pour the milk and egg yolk mixture into the saucepan with the dry ingredients. Place the saucepan over medium heat. Continuously whisk the mixture. Bring the mixture to a gentle boil, letting it bubble for about one minute while still whisking. The filling will thicken significantly and should coat the back of a spoon.
- Finish the Filling: Remove the saucepan from the heat immediately after it thickens. Stir in the two tablespoons of unsalted butter and the one teaspoon of vanilla extract until the butter completely melts and fully incorporates into the warm chocolate mixture.
- Fill the Pie Crust: Carefully pour the hot chocolate filling into your pre-baked and cooled 9-inch pie crust. Use a rubber spatula to scrape all the delicious filling from the saucepan and smooth the top.
- Chill the Pie: Allow the pie to cool at room temperature for about 30 minutes. Then, cover it loosely with plastic wrap, ensuring the wrap doesn’t touch the surface of the filling (use toothpicks to prop it up if needed). Refrigerate the pie for at least 4 hours, or preferably overnight. Chilling is crucial for the filling to fully set.
- Serve and Enjoy: Once thoroughly chilled and set, slice your Old-Fashioned Chocolate Pie. Serve each slice with a generous dollop of homemade whipped cream, if desired.