
Life with three active kids means constant snack requests. As a mom who believes food is love and nourishment, I often find myself battling the siren song of processed snacks. Chips, especially, were always a big hit, but the ingredient list often left me feeling a little guilty.
I wanted a crunchy, satisfying alternative that I could feel good about serving, something simple and packed with goodness. That’s when I dove headfirst into creating a snack that truly delivers on taste and nutrition. Today, I’m so excited to share my go-to solution for satisfying those savory cravings: learning How to Make Protein Chips at Home – Easy & Healthy Guide.
This recipe has been a game-changer in our kitchen, transforming simple ingredients into crispy, flavorful chips that my whole family devours. Forget store-bought versions; these homemade protein chips offer a wholesome, delicious crunch without the extra junk. You’ll quickly discover that mastering How to Make Protein Chips at Home – Easy & Healthy Guide is not only straightforward but also incredibly rewarding.
Why You’ll Love This Guide to Making Protein Chips at Home
This isn’t just another snack recipe; it’s a testament to simple, wholesome eating. You will absolutely adore learning How to Make Protein Chips at Home – Easy & Healthy Guide for so many reasons. First, these chips are incredibly healthy.
We pack them with protein, which helps keep you full and satisfied, making them perfect for busy moms, growing kids, or anyone looking for a smarter snack option. Say goodbye to the empty calories and artificial ingredients often found in conventional chips. These homemade protein chips provide sustained energy without the sugar crash. This makes them an ideal choice for an afternoon pick-me-up or a post-workout treat.
Second, the flavor is simply amazing. You can customize them with your favorite seasonings, ensuring every batch perfectly suits your taste buds. From zesty nacho to smoky BBQ, the possibilities are endless.
Plus, the texture is spot-on – wonderfully crispy, just like traditional chips, but with a satisfying chewiness that sets them apart. This guide to protein chips offers a truly versatile base for all your flavor experiments.
Third, this recipe is genuinely easy to follow. I know how precious time is, especially with a bustling household. This step-by-step guide walks you through every part of How to Make Protein Chips at Home – Easy & Healthy Guide, making it accessible for even novice cooks.
You don’t need fancy equipment or culinary expertise to achieve fantastic results. Just a few basic ingredients and a little love go a long way. Preparing these healthy homemade protein chips takes minimal effort but delivers maximum impact. You will quickly see that learning How to Make Protein Chips at Home – Easy & Healthy Guide becomes a regular part of your meal prep routine.
Finally, making your own snacks brings a sense of accomplishment and peace of mind. You control every ingredient that goes into your body and your family’s bodies. This empowers you to make healthier choices and reduce reliance on packaged goods.
Embrace the joy of creating delicious, nutritious food from scratch. This comprehensive guide, “How to Make Protein Chips at Home – Easy & Healthy Guide,” helps you achieve just that. You are going to love these protein chips, I promise!
Ingredients You’ll Need
Gathering your ingredients is the first exciting step in learning How to Make Protein Chips at Home – Easy & Healthy Guide. You’ll find these items are simple, readily available, and form the perfect foundation for our delicious, healthy chips. I always keep these staples on hand, ensuring I can whip up a batch whenever a craving strikes. This easy protein chip recipe relies on wholesome components.
| Ingredient | Quantity |
|---|---|
| Canned Chickpeas (garbanzo beans) | 1 (15-ounce) can, rinsed and drained |
| Nutritional Yeast | 1/4 cup |
| Tapioca Flour (or arrowroot starch) | 2 tablespoons |
| Garlic Powder | 1 teaspoon |
| Onion Powder | 1/2 teaspoon |
| Smoked Paprika | 1/2 teaspoon |
| Salt | 1/2 teaspoon (or to taste) |
| Black Pepper | 1/4 teaspoon (or to taste) |
| Water | 2-3 tablespoons (as needed) |
| Olive Oil (or avocado oil) | 1-2 tablespoons, for brushing |
Each ingredient plays a crucial role in making these amazing protein chips. The chickpeas provide the protein and a wonderful base texture. Nutritional yeast adds a cheesy, umami flavor without any dairy, making these healthy homemade protein chips suitable for many dietary needs.
Tapioca flour ensures a crisp texture. The spices—garlic powder, onion powder, smoked paprika, salt, and pepper—create that irresistible savory profile we all love in a good chip. You will quickly discover the magic of these simple ingredients when you follow this guide on How to Make Protein Chips at Home – Easy & Healthy Guide.
Substitutions & Variations
One of the best things about learning How to Make Protein Chips at Home – Easy & Healthy Guide is the flexibility it offers. You can easily adapt this recipe to suit your dietary needs, preferences, or simply whatever you have in your pantry. Don’t be afraid to experiment! This truly is an adaptable easy protein chip recipe.
- Chickpeas: While chickpeas are excellent, you can experiment with other legumes. Cooked cannellini beans or even black beans (though they will change the color and flavor significantly) could work. Just ensure they are thoroughly drained and rinsed.
- Flour: If you don’t have tapioca flour, arrowroot starch is an excellent substitute, offering similar binding and crisping properties. Cornstarch can also work in a pinch, though the texture might vary slightly.
- Nutritional Yeast: This provides that signature cheesy flavor. If you prefer a non-cheesy chip, you can omit it. The chips will still be delicious and savory with just the other spices.
- Spices: This is where you can truly make these protein chips your own!
- Spicy Chips: Add a pinch of cayenne pepper or chili powder to the mix.
- Herb Chips: Mix in dried oregano, basil, or rosemary for an aromatic twist.
- Ranch Flavored: Combine dried dill, chives, garlic powder, onion powder, and a touch of buttermilk powder (if not vegan).
- BBQ Chips: Increase the smoked paprika and add a dash of brown sugar and a pinch of cumin.
- Salt & Vinegar: After baking, lightly mist with white vinegar and sprinkle with extra salt.
- Oil: Olive oil or avocado oil work best for brushing, providing a light crisp. Coconut oil (melted) can also be used, but it might impart a subtle flavor.
- Sweet Protein Chips? While unusual, you could try a cinnamon-sugar variation if you’re feeling adventurous. Reduce savory spices and add cinnamon, a touch of sweetener, and perhaps some ginger.
Remember, the goal is a balance of flavor and texture. Feel confident in trying new things as you follow this How to Make Protein Chips at Home – Easy & Healthy Guide. These healthy homemade protein chips are forgiving and delicious no matter your creative twists.
The joy of cooking at home lies in its adaptability, allowing you to get creative with ingredients and meal types. Just as you can experiment with different bases for your protein chips, you can also explore new breakfast horizons by learning How to make the perfect sweet & savory homemade McGriddle breakfast sandwich.
Step-by-Step Instructions
Let’s get cooking! Learning How to Make Protein Chips at Home – Easy & Healthy Guide is incredibly straightforward. Just follow these steps, and you’ll have crispy, delicious protein chips in no time. This easy protein chip recipe is designed for simplicity and success.
- Prepare Your Workspace: Preheat your oven to 375°F (190°C). Line two large baking sheets with parchment paper. This prevents sticking and makes cleanup a breeze.
- Process the Chickpeas: Drain and rinse your can of chickpeas thoroughly. Place the rinsed chickpeas into a food processor. Process until they form a coarse, somewhat crumbly paste.
- Add Dry Ingredients: To the food processor, add the nutritional yeast, tapioca flour, garlic powder, onion powder, smoked paprika, salt, and black pepper. Process again until all ingredients are well combined and the mixture forms a thick, sticky dough. It should come together and pull away from the sides of the bowl.
- Adjust Consistency (if needed): If your dough seems too dry and isn’t coming together, add water, one tablespoon at a time, and process until it reaches a pliable, play-dough-like consistency. Avoid adding too much water, as this can make the chips less crispy.
- Roll Out the Dough: Divide the dough into two equal portions. Place one portion between two sheets of parchment paper. Using a rolling pin, roll the dough out as thinly as possible, aiming for about 1/16 to 1/8 inch thick. The thinner the dough, the crispier your healthy homemade protein chips will be. Repeat with the second portion of dough.
- Cut the Chips: Carefully remove the top layer of parchment paper. Use a pizza cutter, a sharp knife, or even cookie cutters to cut the rolled-out dough into chip shapes. Triangles, squares, or rectangles all work beautifully. Don’t worry if they’re not perfectly uniform; homemade charm is part of the appeal!
- Arrange on Baking Sheets: Gently transfer the cut chips to your prepared baking sheets. Arrange them in a single layer, ensuring they don’t overlap. Overlapping can prevent even crisping.
- Brush with Oil: Lightly brush the tops of the chips with olive oil or avocado oil. This helps them get beautifully golden and extra crispy.
- Bake: Bake the chips for 15-20 minutes, or until they are golden brown and firm to the touch. Baking time can vary depending on your oven and how thin you rolled your dough. For optimal crispiness, you might need to rotate the trays halfway through baking. Watch them closely, as they can go from perfectly crisp to burnt very quickly.
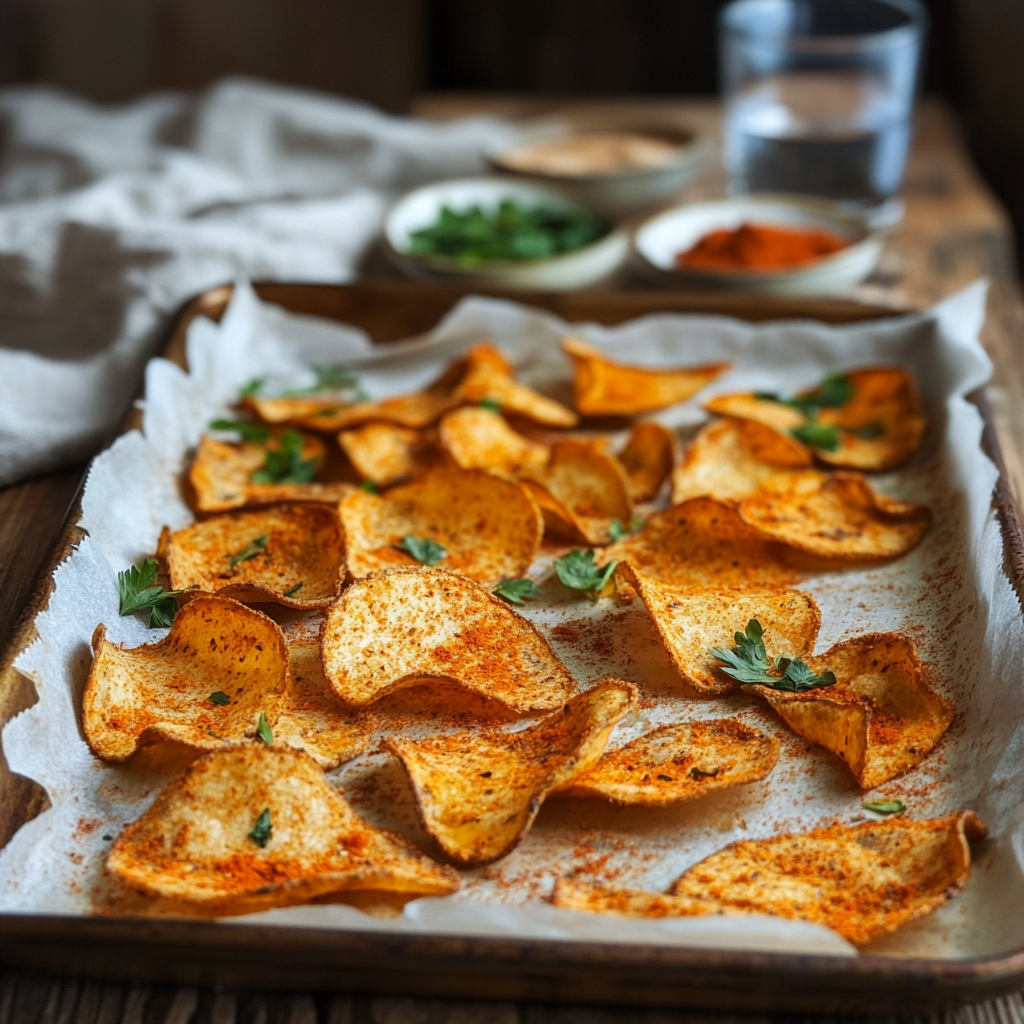
- Cool and Crisp: Once baked, remove the chips from the oven and let them cool completely on the baking sheets. They will continue to crisp up as they cool. This is a crucial step for achieving that perfect chip texture.
- Serve and Enjoy: Once cool, transfer your homemade protein chips to a serving bowl. Enjoy your delicious, healthy, and satisfying snack! You have successfully mastered How to Make Protein Chips at Home – Easy & Healthy Guide.
Pro Tips for Success
Making delicious protein chips is truly simple, but a few insider tips can elevate your results from good to absolutely amazing. These strategies help you perfect How to Make Protein Chips at Home – Easy & Healthy Guide every single time. Master these for the best easy protein chip experience.
- Roll It Thin: This is arguably the most important tip. The thinner you roll the dough, the crispier your healthy homemade protein chips will be. Aim for cracker-thinness, about 1/16 to 1/8 inch. If they are too thick, they will be chewy, not crispy. Use parchment paper on both sides for effortless rolling and to prevent sticking.
- Don’t Over-Process: While you want a smooth dough, avoid over-processing the chickpeas to the point of a liquid paste. A slightly coarse texture is fine and even desirable. Over-processing can make the dough too sticky and hard to handle.
- Keep an Eye on the Oven: Ovens vary significantly. Start checking your chips at the 15-minute mark. If you see edges browning quickly, rotate your trays or adjust the temperature slightly. Burnt protein chips are no fun!
- Cool Completely: Patience is key here. Your chips will continue to crisp up as they cool down. Resist the urge to snack on them warm (I know, it’s hard!). Letting them cool on the baking sheet on a wire rack allows air circulation, which is vital for maximum crunch.
- Flavor Boosters: Don’t just stick to the basics. Before baking, you can sprinkle additional seasonings directly onto the oiled chips for an extra burst of flavor. Think a dash of chili lime seasoning, some extra smoked paprika, or even a sprinkle of everything bagel seasoning. This is part of the fun of learning How to Make Protein Chips at Home – Easy & Healthy Guide.
- Uniformity Matters: Try to cut your chips into similar sizes and thicknesses. This ensures they bake evenly, preventing some from burning while others remain undercooked.
- Air Fryer Option: For an even crispier result and quicker cooking, try air frying! Preheat your air fryer to 350°F (175°C). Cook in batches, placing chips in a single layer, for 8-12 minutes, flipping halfway, until golden and crispy. Adjust cooking time based on your air fryer model. This method truly elevates your healthy homemade protein chips.
- Storage for Crispiness: Proper storage is crucial to maintain crunch. See the section below for detailed tips.
Following these pro tips will ensure your journey in mastering How to Make Protein Chips at Home – Easy & Healthy Guide is a resounding success. You’ll produce perfectly crispy, flavorful protein chips every time.
Achieving the perfect texture, like crispiness for chips, often comes down to mastering specific techniques and precise execution. Similarly, understanding the ideal quantity of ingredients is key to culinary success, such as knowing How Much Shredded Cheese on 1 Hard Shell Taco? The Ultimate Guide.
Storage & Reheating Tips
Once you’ve gone through the effort of learning How to Make Protein Chips at Home – Easy & Healthy Guide, you want to make sure they stay fresh and crispy. Proper storage is key to maintaining that delightful crunch.
- Room Temperature Storage: Store your cooled protein chips in an airtight container at room temperature for up to 3-5 days. A glass container with a tight-fitting lid works wonderfully. Avoid storing them in plastic bags if possible, as this can sometimes lead to them becoming slightly softer.
- Preventing Softness: The enemy of crispy chips is moisture. Ensure your chips are completely cool before storing them. Any residual warmth will create condensation, making them soft. You can also place a paper towel at the bottom of the container to absorb any excess moisture.
- Reheating for Crispness: If your chips lose some of their crispness over time, a quick reheat can bring them back to life. Spread them in a single layer on a baking sheet and bake at 300°F (150°C) for 5-7 minutes, or until they are crispy again. You can also pop them in an air fryer at 300°F (150°C) for 2-4 minutes. Keep a close eye on them to prevent burning. This quick trick will revitalize your healthy homemade protein chips and is a valuable part of this How to Make Protein Chips at Home – Easy & Healthy Guide.
- Freezing: I don’t recommend freezing baked protein chips, as the texture can become compromised upon thawing. However, you can freeze the raw, rolled-out, and cut dough. Layer the cut dough shapes between parchment paper in an airtight container or freezer bag. When ready to bake, transfer directly from the freezer to a parchment-lined baking sheet and bake as directed, adding a few extra minutes to the cooking time.
With these storage and reheating tips, you can enjoy your homemade protein chips for days, always ready for a healthy and delicious snack. Knowing How to Make Protein Chips at Home – Easy & Healthy Guide extends beyond the baking; it includes enjoying them optimally.
What to Serve With This Recipe
These protein chips are fantastic on their own, but they also make an incredible vehicle for dips and a wonderful addition to meals. Learning How to Make Protein Chips at Home – Easy & Healthy Guide opens up a world of serving possibilities. These easy protein chips are versatile!
- Classic Dips:
- Homemade Guacamole: Creamy, fresh, and full of healthy fats.
- Salsa: A vibrant, tangy complement to the savory chips.
- Hummus: Double the chickpea goodness! Try a roasted red pepper or a spicy jalapeño hummus.
- Greek Yogurt Dip: Mix plain Greek yogurt with herbs like dill, chives, garlic powder, and a squeeze of lemon for a healthy, creamy dip.
- As Part of a Meal:
- Crumbled Topping: Crush them slightly and sprinkle over salads, soups, or chili for an added crunch and protein boost.
- Nachos (Healthy Style): Layer your healthy homemade protein chips with black beans, corn, salsa, a sprinkle of cheese (or dairy-free alternative), and a dollop of Greek yogurt or guacamole. Bake briefly until warm and bubbly. This is a brilliant way to use your knowledge of How to Make Protein Chips at Home – Easy & Healthy Guide.
- Lunchbox Addition: Pack a small baggie of these chips alongside a sandwich or some cut-up veggies for a satisfying school or work lunch.
- Snack Board: Arrange them on a platter with cheese, olives, nuts, and fruit for a sophisticated and healthy appetizer spread.
- With Sandwiches/Wraps: Serve a side of these crispy protein chips instead of traditional potato chips with your favorite sandwich or wrap for a more nutritious meal.
- Kid-Friendly Dipping: My kids love dipping them in ketchup (in moderation!) or a mild ranch dip. It makes eating their protein fun!
The versatility of these homemade protein chips means you’ll always find a delicious way to enjoy them. This aspect truly makes learning How to Make Protein Chips at Home – Easy & Healthy Guide such a valuable skill in a healthy kitchen.
These homemade protein chips prove that a simple base can be a fantastic vehicle for various flavors and a versatile component in any meal. Extending this principle, you might also find immense satisfaction in crafting other meal foundations from scratch, like learning How to Make Taco Shells: The Ultimate Guide to Homemade Soft & Crispy Tacos.
FAQs
Can I make these protein chips without a food processor?
While a food processor works best for achieving a smooth, uniform dough, you can try to mash the chickpeas thoroughly with a fork or potato masher. Then, mix in the dry ingredients by hand until a cohesive dough forms. It might require a bit more effort and the texture might be slightly different, but it’s definitely doable. This makes learning How to Make Protein Chips at Home – Easy & Healthy Guide accessible to everyone.
Are these chips gluten-free?
Yes, absolutely! Chickpeas are naturally gluten-free. As long as you use gluten-free tapioca flour (or arrowroot starch) and ensure your seasonings are certified gluten-free, these healthy homemade protein chips are entirely safe for those avoiding gluten. This easy protein chip recipe is a great choice for various dietary needs.
How can I make the chips extra crispy?
Several factors contribute to extra crispiness. First, roll the dough as thinly as possible – seriously, aim for paper-thin if you can manage it. Second, don’t overcrowd the baking sheets; allow space for air circulation.
Third, bake them until they are deeply golden brown, almost on the verge of being overcooked, but not burnt. Finally, ensure they cool completely on the baking sheet to allow them to crisp up further. An air fryer is also excellent for achieving maximum crunch. These tips are vital when you’re learning How to Make Protein Chips at Home – Easy & Healthy Guide.
Can I use dried chickpeas instead of canned?
Yes, you certainly can! You will need to cook them first. Soak dried chickpeas overnight, then boil or pressure cook them until very tender.
You’ll need about 1.5 cups of cooked chickpeas to substitute for one 15-ounce can. Make sure they are thoroughly drained before using them in the recipe. This extra step is worth it if you prefer cooking from scratch. This makes the “How to Make Protein Chips at Home – Easy & Healthy Guide” even more versatile.
What if my dough is too sticky or too dry?
This often happens when learning How to Make Protein Chips at Home – Easy & Healthy Guide. If the dough is too sticky, add a little more tapioca flour (half a tablespoon at a time) and process until it’s more manageable. If it’s too dry and crumbly, add water, one teaspoon at a time, until the dough comes together.
The ideal consistency is like play-dough – firm but pliable. This simple adjustment ensures your healthy homemade protein chips turn out perfectly.
Are these chips suitable for meal prep?
Absolutely! Making a larger batch of these protein chips is perfect for meal prep. You can store them in an airtight container and have a healthy, convenient snack ready for days.
This easy protein chip recipe is a fantastic way to stay ahead of snack cravings. Just follow the storage tips to maintain their freshness and crunch.
In a world increasingly focused on wellness and convenience, homemade snacks like protein chips offer a fantastic way to control ingredients and boost nutritional intake. This approach aligns with the growing global trend of mindful eating and personalized dietary choices, transforming the way many people view their daily snack options.
Nutrition Information (per serving)
Understanding the nutritional benefits is a key part of appreciating How to Make Protein Chips at Home – Easy & Healthy Guide. These values are approximate and can vary based on specific ingredients, exact quantities, and the size of your chips. This information is based on dividing the recipe into 8 servings.
| Nutrient | Amount |
|---|---|
| Calories | 120-140 kcal |
| Protein | 6-8g |
| Fat | 4-6g |
| (Saturated Fat) | 0.5-1g |
| Carbohydrates | 16-18g |
| (Fiber) | 3-4g |
| (Sugars) | 0-1g |
| Sodium | 150-200mg |
As you can see, these healthy homemade protein chips offer a fantastic balance of protein, fiber, and healthy fats, making them a much more nourishing choice than many store-bought alternatives. They are designed to keep you feeling full and energized. This nutritional profile makes learning How to Make Protein Chips at Home – Easy & Healthy Guide a truly smart decision for your well-being. Enjoy these delicious and guilt-free snacks!
How to Make Protein Chips at Home – Easy & Healthy Guide
Ingredients
Method
- Preheat your oven to 375°F (190°C). Line two large baking sheets with parchment paper.
- Drain and rinse your can of chickpeas thoroughly. Place the rinsed chickpeas into a food processor. Process until they form a coarse, somewhat crumbly paste.
- To the food processor, add the nutritional yeast, tapioca flour, garlic powder, onion powder, smoked paprika, salt, and black pepper. Process again until all ingredients are well combined and the mixture forms a thick, sticky dough. It should come together and pull away from the sides of the bowl.
- If your dough seems too dry and isn't coming together, add water, one tablespoon at a time, and process until it reaches a pliable, play-dough-like consistency. Avoid adding too much water, as this can make the chips less crispy.
- Divide the dough into two equal portions. Place one portion between two sheets of parchment paper. Using a rolling pin, roll the dough out as thinly as possible, aiming for about 1/16 to 1/8 inch thick. The thinner the dough, the crispier your healthy homemade protein chips will be. Repeat with the second portion of dough.
- Carefully remove the top layer of parchment paper. Use a pizza cutter, a sharp knife, or even cookie cutters to cut the rolled-out dough into chip shapes. Triangles, squares, or rectangles all work beautifully.
- Gently transfer the cut chips to your prepared baking sheets. Arrange them in a single layer, ensuring they don't overlap.
- Lightly brush the tops of the chips with olive oil or avocado oil. This helps them get beautifully golden and extra crispy.
- Bake the chips for 15-20 minutes, or until they are golden brown and firm to the touch. Baking time can vary depending on your oven and how thin you rolled your dough. For optimal crispiness, you might need to rotate the trays halfway through baking. Watch them closely, as they can go from perfectly crisp to burnt very quickly.
- Once baked, remove the chips from the oven and let them cool completely on the baking sheets. They will continue to crisp up as they cool. This is a crucial step for achieving that perfect chip texture.
- Once cool, transfer your homemade protein chips to a serving bowl. Enjoy your delicious, healthy, and satisfying snack!